Set up a virtual Airwall Gateway in Microsoft Hyper-V
The virtualization server role for Windows Server 2012 R2 is called Hyper-V Manager. The following documentation show the steps to implement and manage a secure Airwall Gateway and overlay network on Hyper-V network.
Required Licenses
An Airwall 300v license for each virtual Airwall Gateway you are setting up.
Prerequisites
- An existing installation of Microsoft Hyper-V, v2012 or later
- An Airwall Gateway .vhdx file. Download the .vhdx file from Latest firmware and software.
- The Conductor you are connecting to configured and available.
Install the Airwall Gateway in Hyper-V
-
Open a Hyper-V Manager Console from within your Windows Machine.
- Hyper-V Manager in Windows Server 2012 or Windows Server 2012 R2:
- In the lower left-corner, select the Windows icon.
- Search for Hyper-V Manager and open it.
- All other versions:
- Right-click in the lower left-hand corner and select Run. Type virtmgmt.msc to open the Hyper-V Manager snap-in.
- Hyper-V Manager in Windows Server 2012 or Windows Server 2012 R2:
-
Go to the Actions pane and select to create a virtual machine for your Airwall Gateway.
Note: A wizard takes you through the steps to create a New Virtual Machine.
- Select Specify Name and Location and give your Airwall Gateway a Name.
- Leave Store the virtual machine in a different location unchecked and click Next.
- For Specify Generation, select Generation 1, and select Next.
-
Set the Startup memory to at least 1 gigabyte of
ram (1024).
Note: Consider how much memory you want to assign your virtual machine, as this is the machine that both contains your data and runs the operating system.
- Do not check the Use Dynamic Memory box. Select Next.
- In Configure Networking, from the Connection drop-down, select Not Connected. You add this connection later.
- Select Next.
- Under Connect Virtual Hard Disk, select Use Existing virtual hard disk, browse to the location where you saved the vhdx file downloaded from Tempered. Select it and click OK.
-
Click Next to complete the set up and view the
Summary page. You are now ready to add your network
adapters.
Important: Do not start the machine until you set up the hardware using the procedure below.
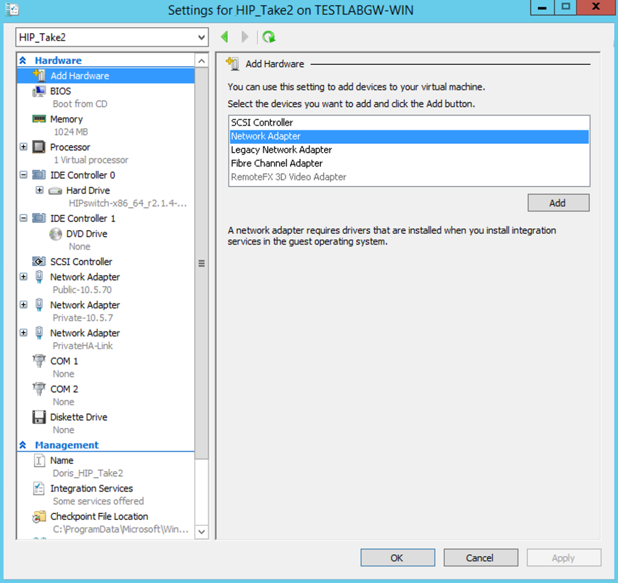
Add Network Adapters
Once you are finished installing the Airwall Gateway software, you are ready to add the network adapters to the machine that will serve as your Airwall Gateway.
- From the Virtual Machines list, find your Airwall Gateway machine and select .
-
Add a minimum of two Network Adapters. To set the first network adapter,
select and click Add.
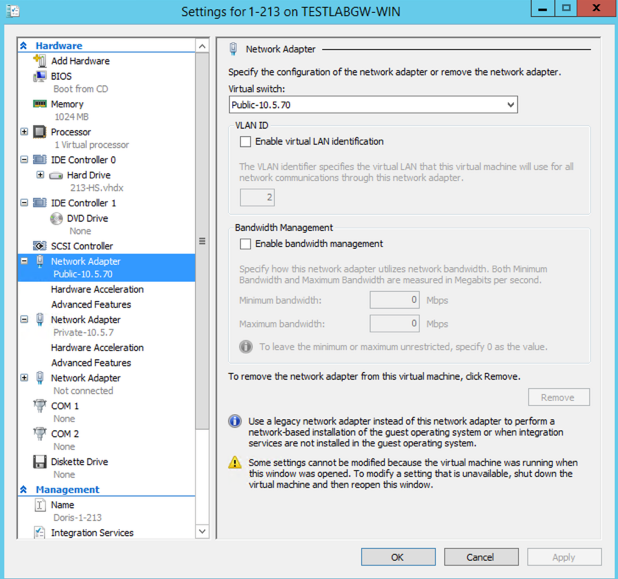
-
Configure the first adapter to connect to your underlay.
Leave the VLAN ID and Bandwidth
Management options unchecked and click
OK.
-
Return to Add Hardware and configure the second private
adapter to connect to your overlay.
Leave the VLAN ID and Bandwidth
Management options unchecked and click
OK.
 Note: You can have up to two private isolated links. If you are using HA, you can create another adapter and set it to private. For more information on HA, see Airwall Edge Service High Availability (HA).
 -
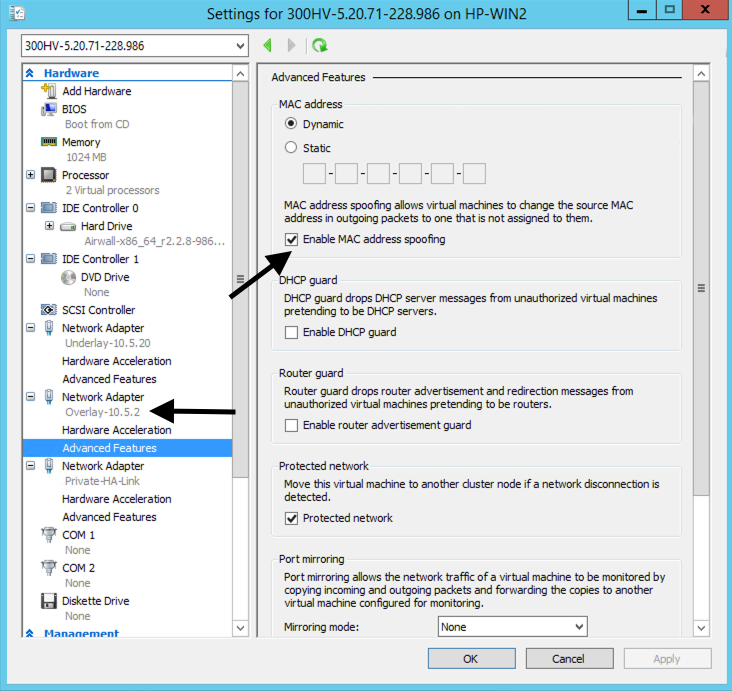
Click the plus (next to the overlay Network Adapter, and select
Advanced Features, and check Enable MAC
address spoofing.
-
Select the Airwall Gateway
machine and open the Networking tab to review your
settings. Your settings should be similar to this example:

Configure the virtual Airwall Gateway
Connect your virtual Airwall Gateway to your Conductor and configure it.
- In Hyper-V, select your virtual Airwall Gateway and then select .
- Log in to Airshell.
- Configure the Conductor and other settings. For more information, see Configuring an Airwall Gateway with the airsh setup wizard.