Set up a virtual HIPswitch in Microsoft Hyper-V

The virtualization server role for Windows Server 2012 R2 is called Hyper-V Manager. The following documentation show the steps to implement and manage a secure overlay network on Hyper-V network.

Important: Before you install and set up your HIPswitch on Hyper-V, make sure you have the Conductor you are connecting to configured and available.

HIPswitch Install

  1. Open a Hyper-V Manager Console from within your Windows Machine.
    • (Hyper-V Manager in Windows Server 2012 or Windows Server 2012 R2)
      1. On the lower left-corner, left click on the Windows icon.
      2. Begin typing Hyper-V Manager. The Search box will immediately search for the letters typed and the tool will appear.
      3. Left-click to Open.
    • (All other versions)
      1. Right-click in the lower left-hand corner and select Run. Type virtmgmt.msc and the Hyper-V Manager snap-in loads.
  2. Go to the Actions tab and select Action > New > Virtual Machine to create a virtual machine for your HIPswitch.
    Note: A wizard takes you through the steps to create a New Virtual Machine.
  3. Select Specify Name and Location and give your HIPswitch a Name, leave Store the virtual machine in a different location unchecked and click Next.
  4. Select Generation 1 for the Specify Generation option and click Next.
  5. Set the Startup memory to at least 1 gigabyte of ram (1024). Do not check the Use Dynamic Memory for this virtual machine. Click Next.
    Note: Consider how much memory you want to assign your virtual machine, as this is the machine that will contain both data and run the operating system.
  6. In the Configure Networking section, select Not Connected from the Connection drop-down. You add this connection later in the set up procedure. Click Next.
    • Connect Virtual Hard Disk
      1. Browse to where you saved the *vhdx file, provided by Tempered Networks.
      2. Select the *vhdx file that you are going to use and click OK.
  7. In the Connect Virtual Hard Disk section select Use Existing virtual hard disk, browse to the location where you saved the vhdx file downloaded from Tempered Networks, select it and click OK.
  8. Click Next to complete the set up and view the Summary page. You are now ready to add your hardware.
    Important: Do not start the machine until you set up the hardware using the procedure below.

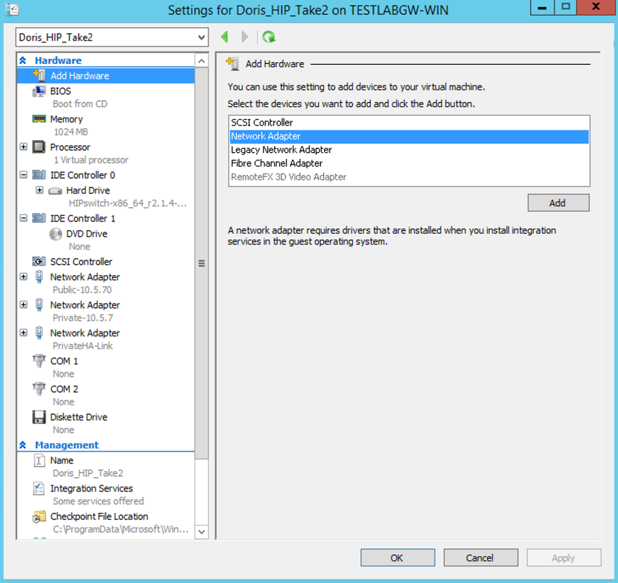
Add Network Adapters

Once you are finished installing the HIPswitch software, you are ready to add the network adapters to the machine that will serve as your HIPswitch.

  1. From the Virtual Machine list, find your HIPswitch machine and select Actions > Settings
  2. You will add a minimum of two Network Adapters. To set the first network adapter, select the HIPswitch and click Settings.
  3. Select Add Hardware > Network Adapter and click Add.


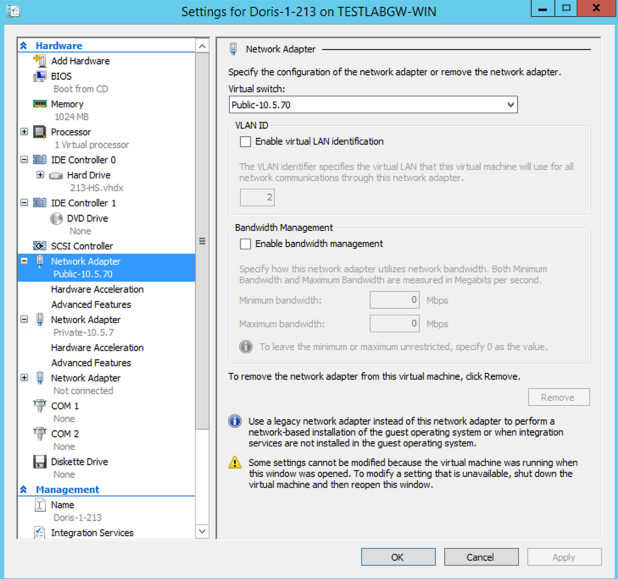
  4. Create the first adapter that will connect to your underlay. Leave the VLAN ID and Bandwidth Management options unchecked and click OK.


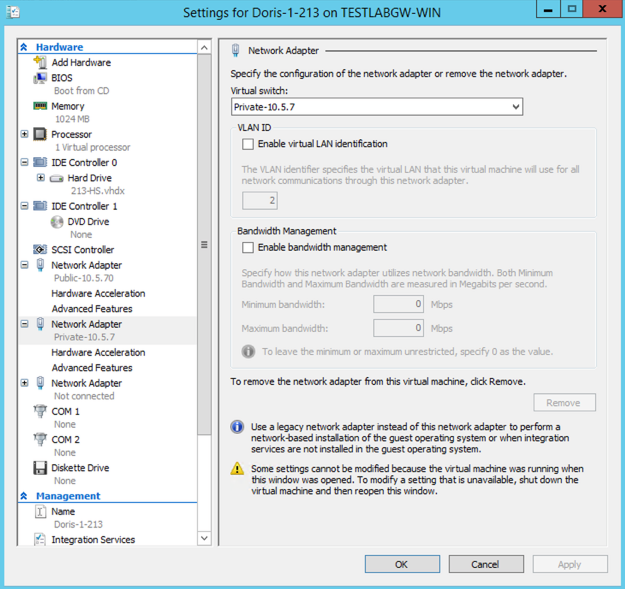
  5. Return to Add Hardware and create the second private adapter that will connect to your overlay. Leave the VLAN ID and Bandwidth Management options unchecked and click OK.


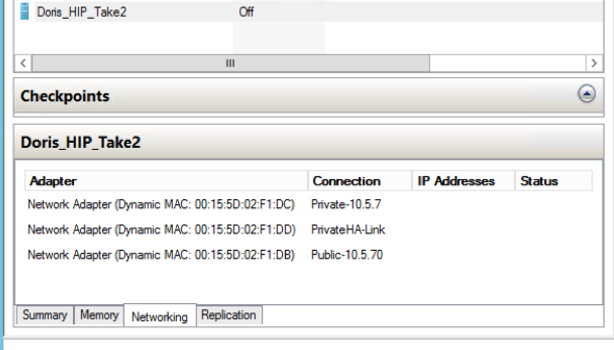
    Note: You can have up to two private isolated links. If you are using HA, you can create another adapter and set it to private. For more information on HA, see HIPservice High Availability (HA).
Once complete, you should review the summary page to ensure your settings are correct, as seen in the example below.

You can now proceed connecting your virtual HIPswitch to your Conductor.