Resolve IP conflicts by giving duplicate devices a NAT IP address
If you have an IP conflict, and want to have policy (set trust) between the conflicting IPs, you can often resolve the issue by giving any devices with duplicate IP addresses a NAT IP address.
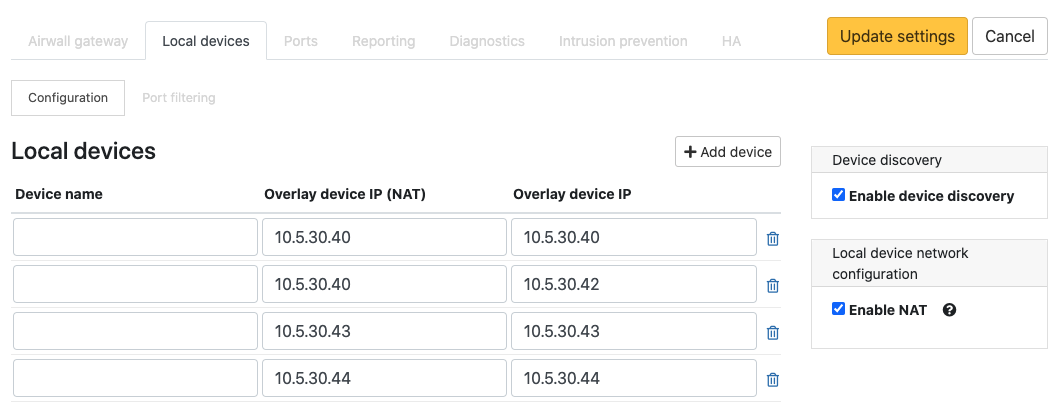
It is important to understand the difference between the two IPs: overlay device IP and overlay device IP (NAT). The overlay device IP is both the local and overlay IP unless NAT is turned on. If NAT is on, then the overlay device IP is only the local IP and the NAT IP is the overlay IP. Other Airwall Gateways only see the overlay IP, so the local IP cannot cause a conflict on them.
It is possible to change the local IP, but you have to be able to change it on the device itself. It is often easier to just NAT the IP if your conflict falls into one of the categories where NAT will fix it (see Handle IP Conflicts). Changing the device’s actual IP and updating its overlay device IP should be reserved for situations that cannot otherwise be solved.
To give a device a NAT IP:
- On the device’s host Airwall Gateway, open the Local devices tab, Configuration subtab, and select Edit Settings.
- On the right, under Local device network configuration, check Enable NAT .
-
In the Local devices table, enter a unique
Overlay device IP (NAT) address for any devices that
will conflict with another device that you want to create policy to (direct,
indirect, or implicit – see Handle IP Conflicts).
- Select Update Settings.