Deploy a Conductor on the Google Cloud Platform (GCP)
You can deploy a Tempered Networks Conductor on GCP and manage physical, virtual, and cloud HIPservices, and HIPclients. Use the following steps to deploy a Conductor on the Google Cloud platform.
Prerequisites
To get started, make sure you have access to your Google Cloud account. If you don't have an account, you can create a free Google Cloud account and upgrade it to a full account later. If you have an existing Google Cloud account, make sure your billing information is set up. You cannot create a project until you are able to link your billing information to your newly created project.
A Conductor license voucher is necessary at the end of this procedure if you want to start the Conductor and verify it is set up correctly. Fulfillment will provide this to you in an email after your purchase is complete.
Log in to Google Cloud
From a Web browser, navigate to https://console.cloud.google.com. You will see one of two pages, the Getting Started page if you have no projects or the Home page if you have existing projects.
Create and configure a project
-
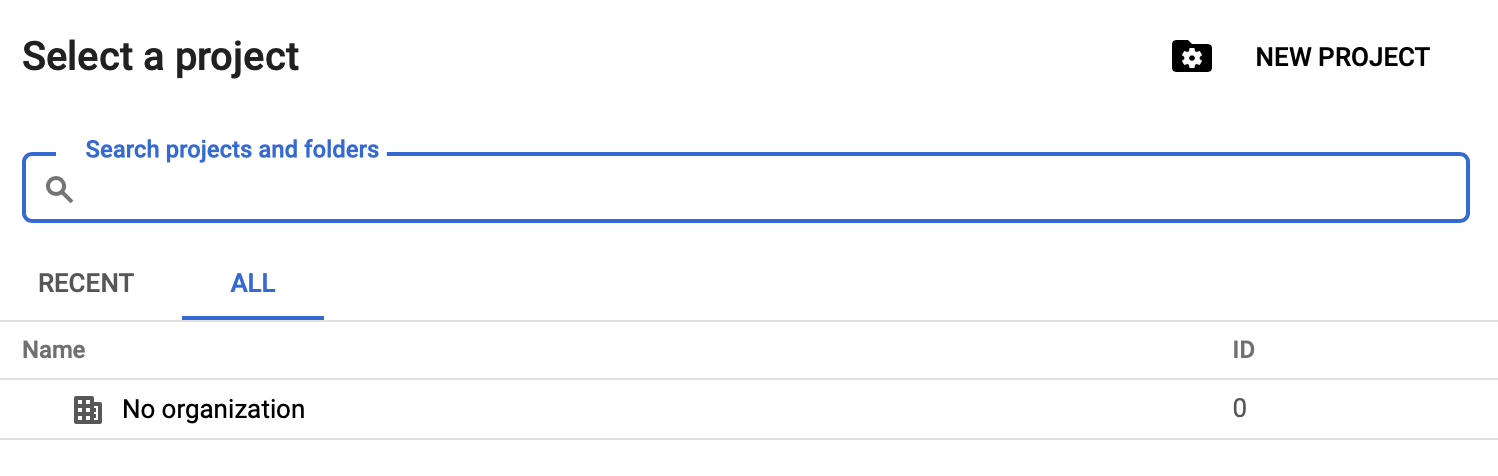
On the top bar of the Google Cloud page, click Select a
project.

-
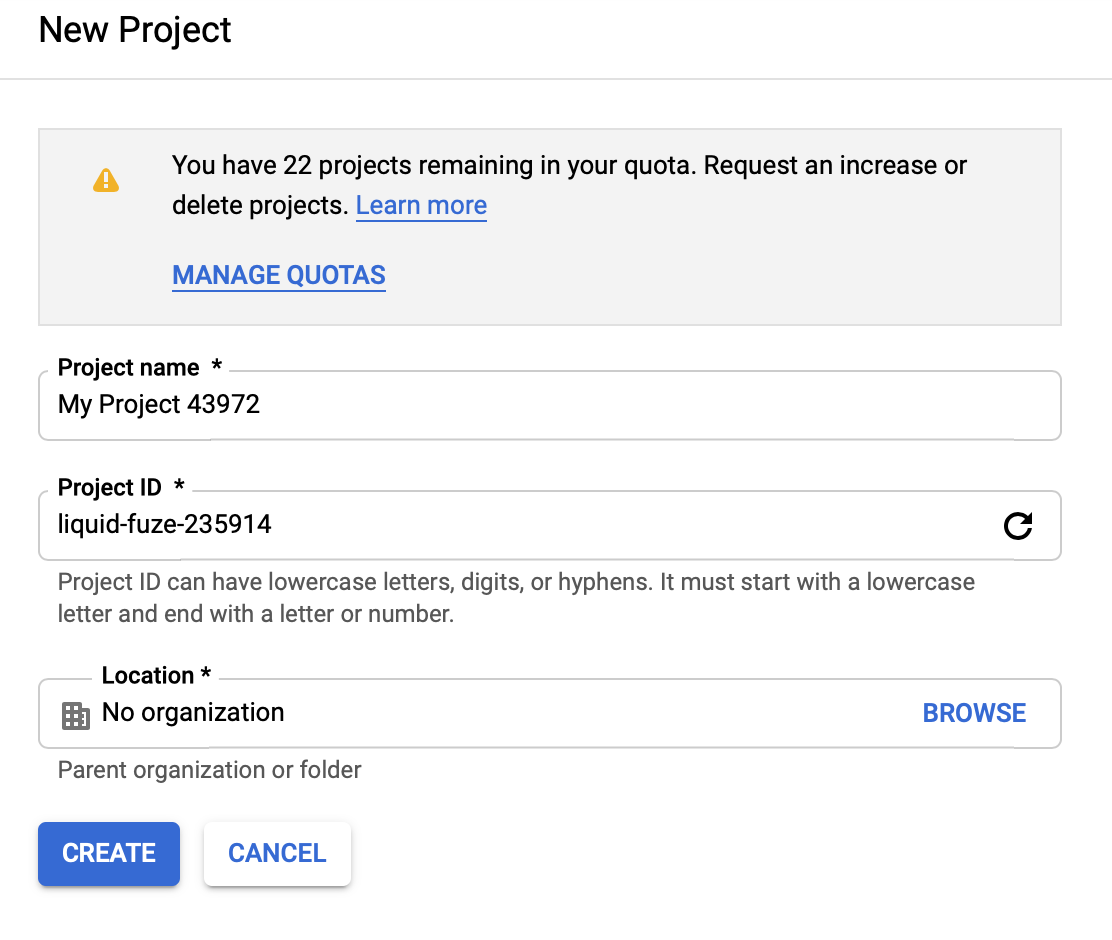
On the upper-right corner of the Select a project dialog, click New
Project.
- Optional:
If you want to add your project to an organization you have already created,
select it in the Location field by clicking
Browse to the right. For more information about
organizations, see Quickstart Using Organizations in the
Google Cloud documentation.
Set up firewall rules
GCP firewall rules will manage the traffic coming into your instance on a network. By default, you have a network with a default set of firewall rules for your region, and you will need to make a few changes to set up your environment so the Conductor can function correctly.
To set up firewall rules:
-
In the Google Cloud sidebar, navigate to the Networking
section, hover over VPC network, and select
Firewall rules.
-
Click Create Firewall Rule.

-
Fill in the Create firewall rule page with the following
information:
- Name
- You can use any name you choose, but it must be lowercase with no spaces.
- Description
- This can be anything you like. We recommend something descriptive such as Firewall access rules for Tempered Networks Conductor.
- Network
- Select default from the drop-down unless you are using a different network.
- Direction of traffic
- Select the Ingress radio button.
- Action on match
- Select the Allow radio button.
- Targets
- Select Specific target tags from the drop-down.
- Target tags
-
Enter tempered-conductor-rulesNote: Remember this tag. You will need it later in this procedure.
- Source filter
- Select IP ranges from the drop-down.
- Source IP ranges
- Enter 0.0.0.0/0.
- Protocols and ports
-
Select the Specified protocols and ports radio button and enter 443,8096.
Note: Do not check the box next to tcp and then select the field to enter your ports – the box will revert to unchecked and disable both fields. Click only on the field to enter your ports.Leave all other fields as is.
Your page should look similar to the image below: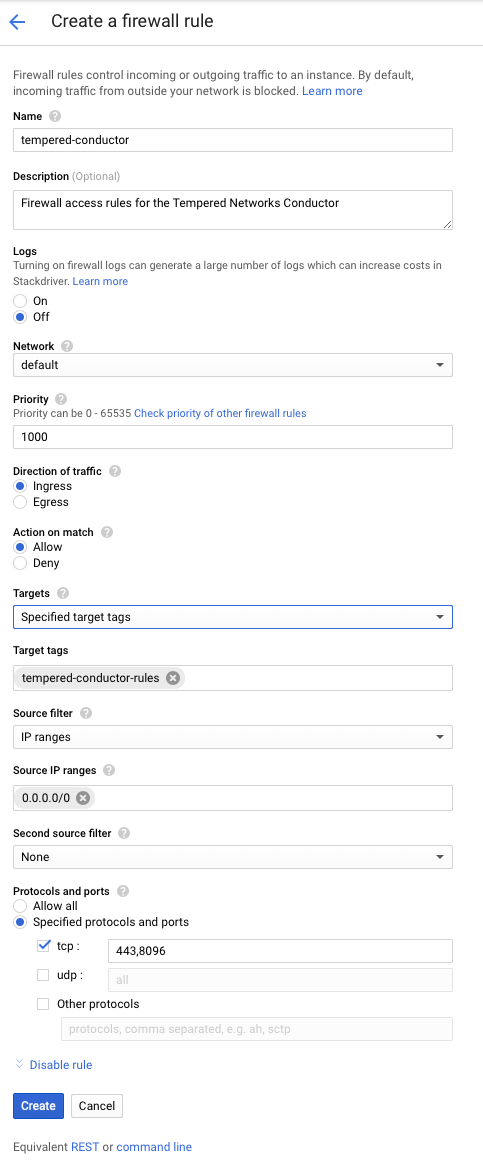
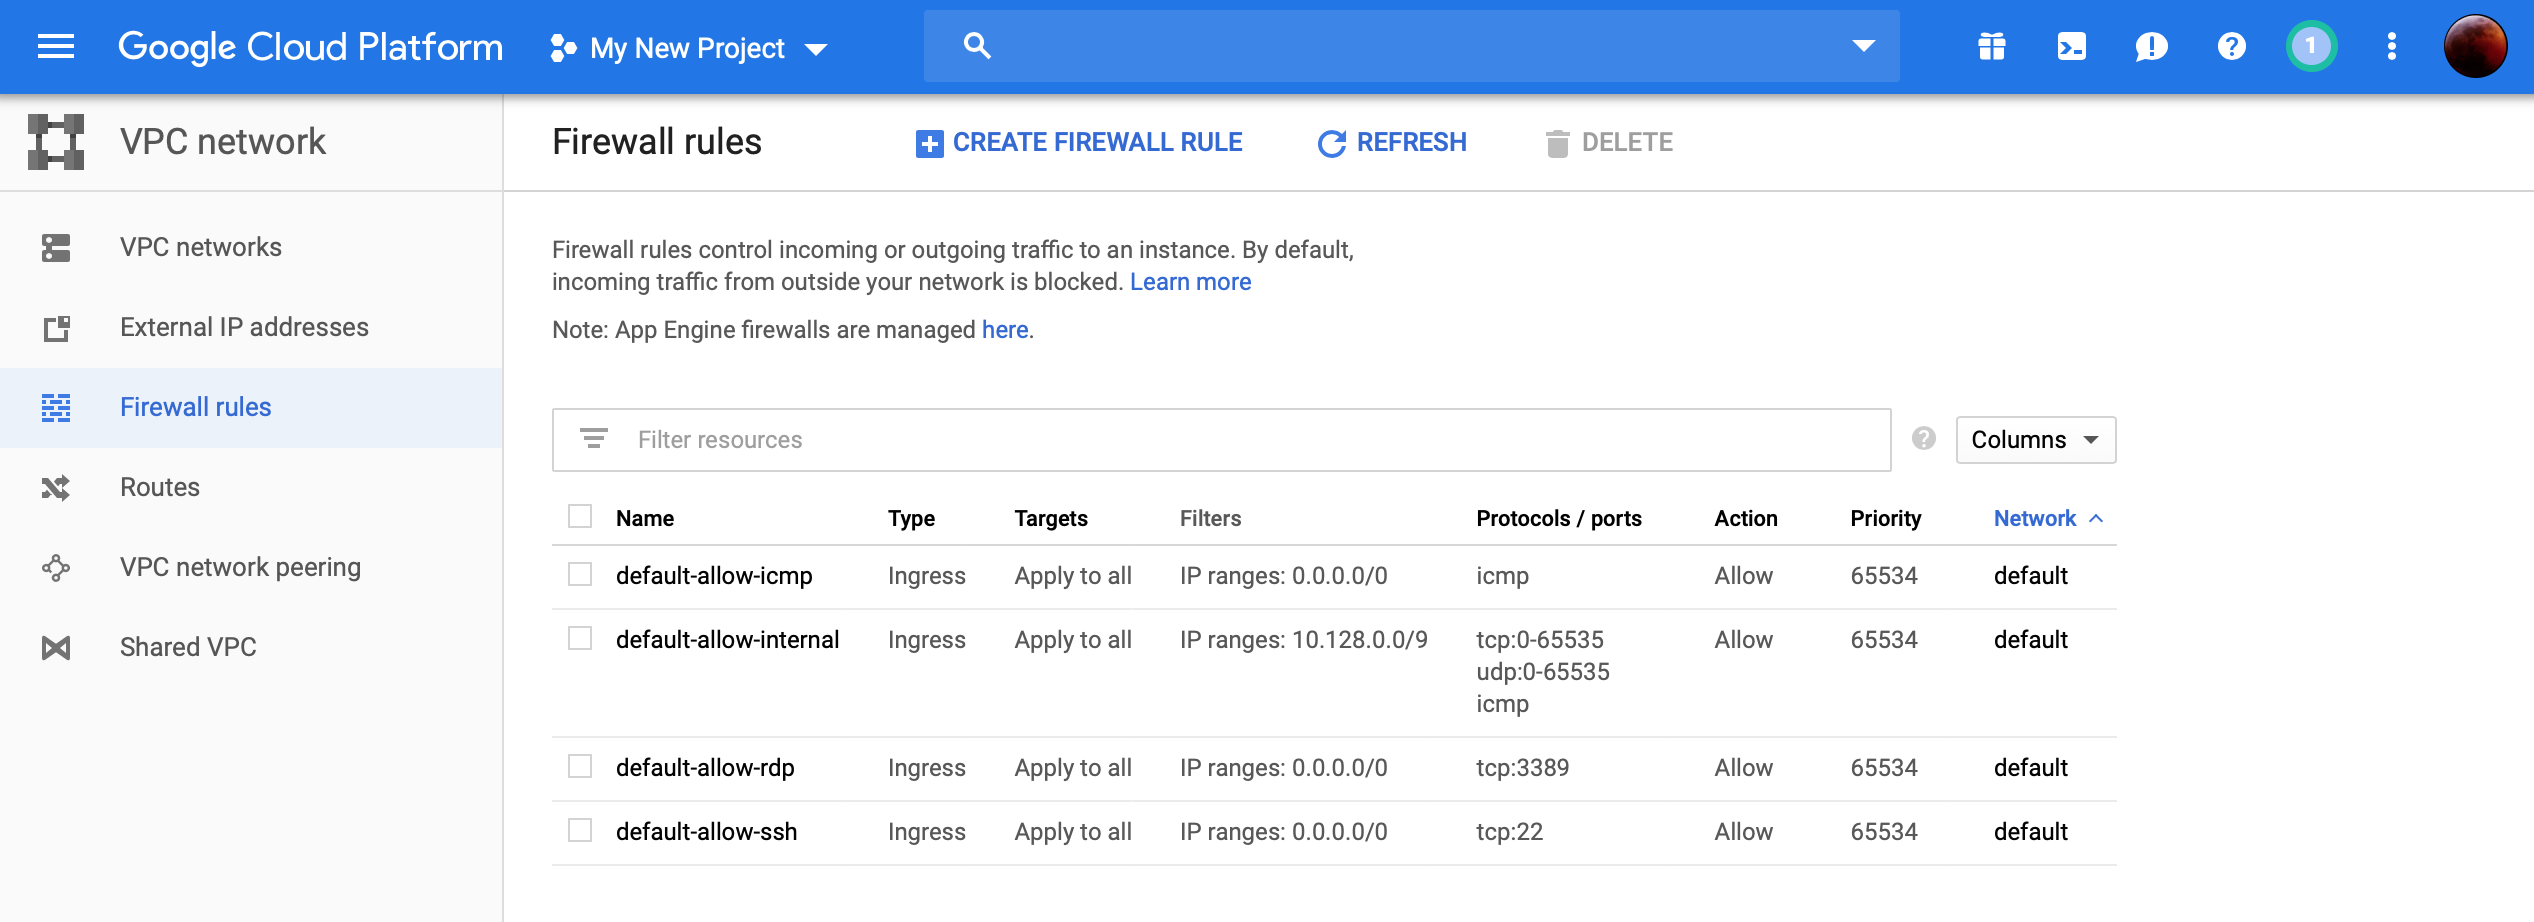
-
Click Create. It will take a moment to finish the
operation. Once complete, you should see the following in your rules list:

Add a Conductor Image
A Conductor image must be available to your project so you can create an instance. This is done in the Compute Engine section of the GCP dashboard.
To add an image:
-
In the Google Cloud sidebar, navigate to the Compute
section, hover over Compute Engine, and select
Images.
-
Click Create Image.

-
Click Create. It will take a moment to finish the
operation.
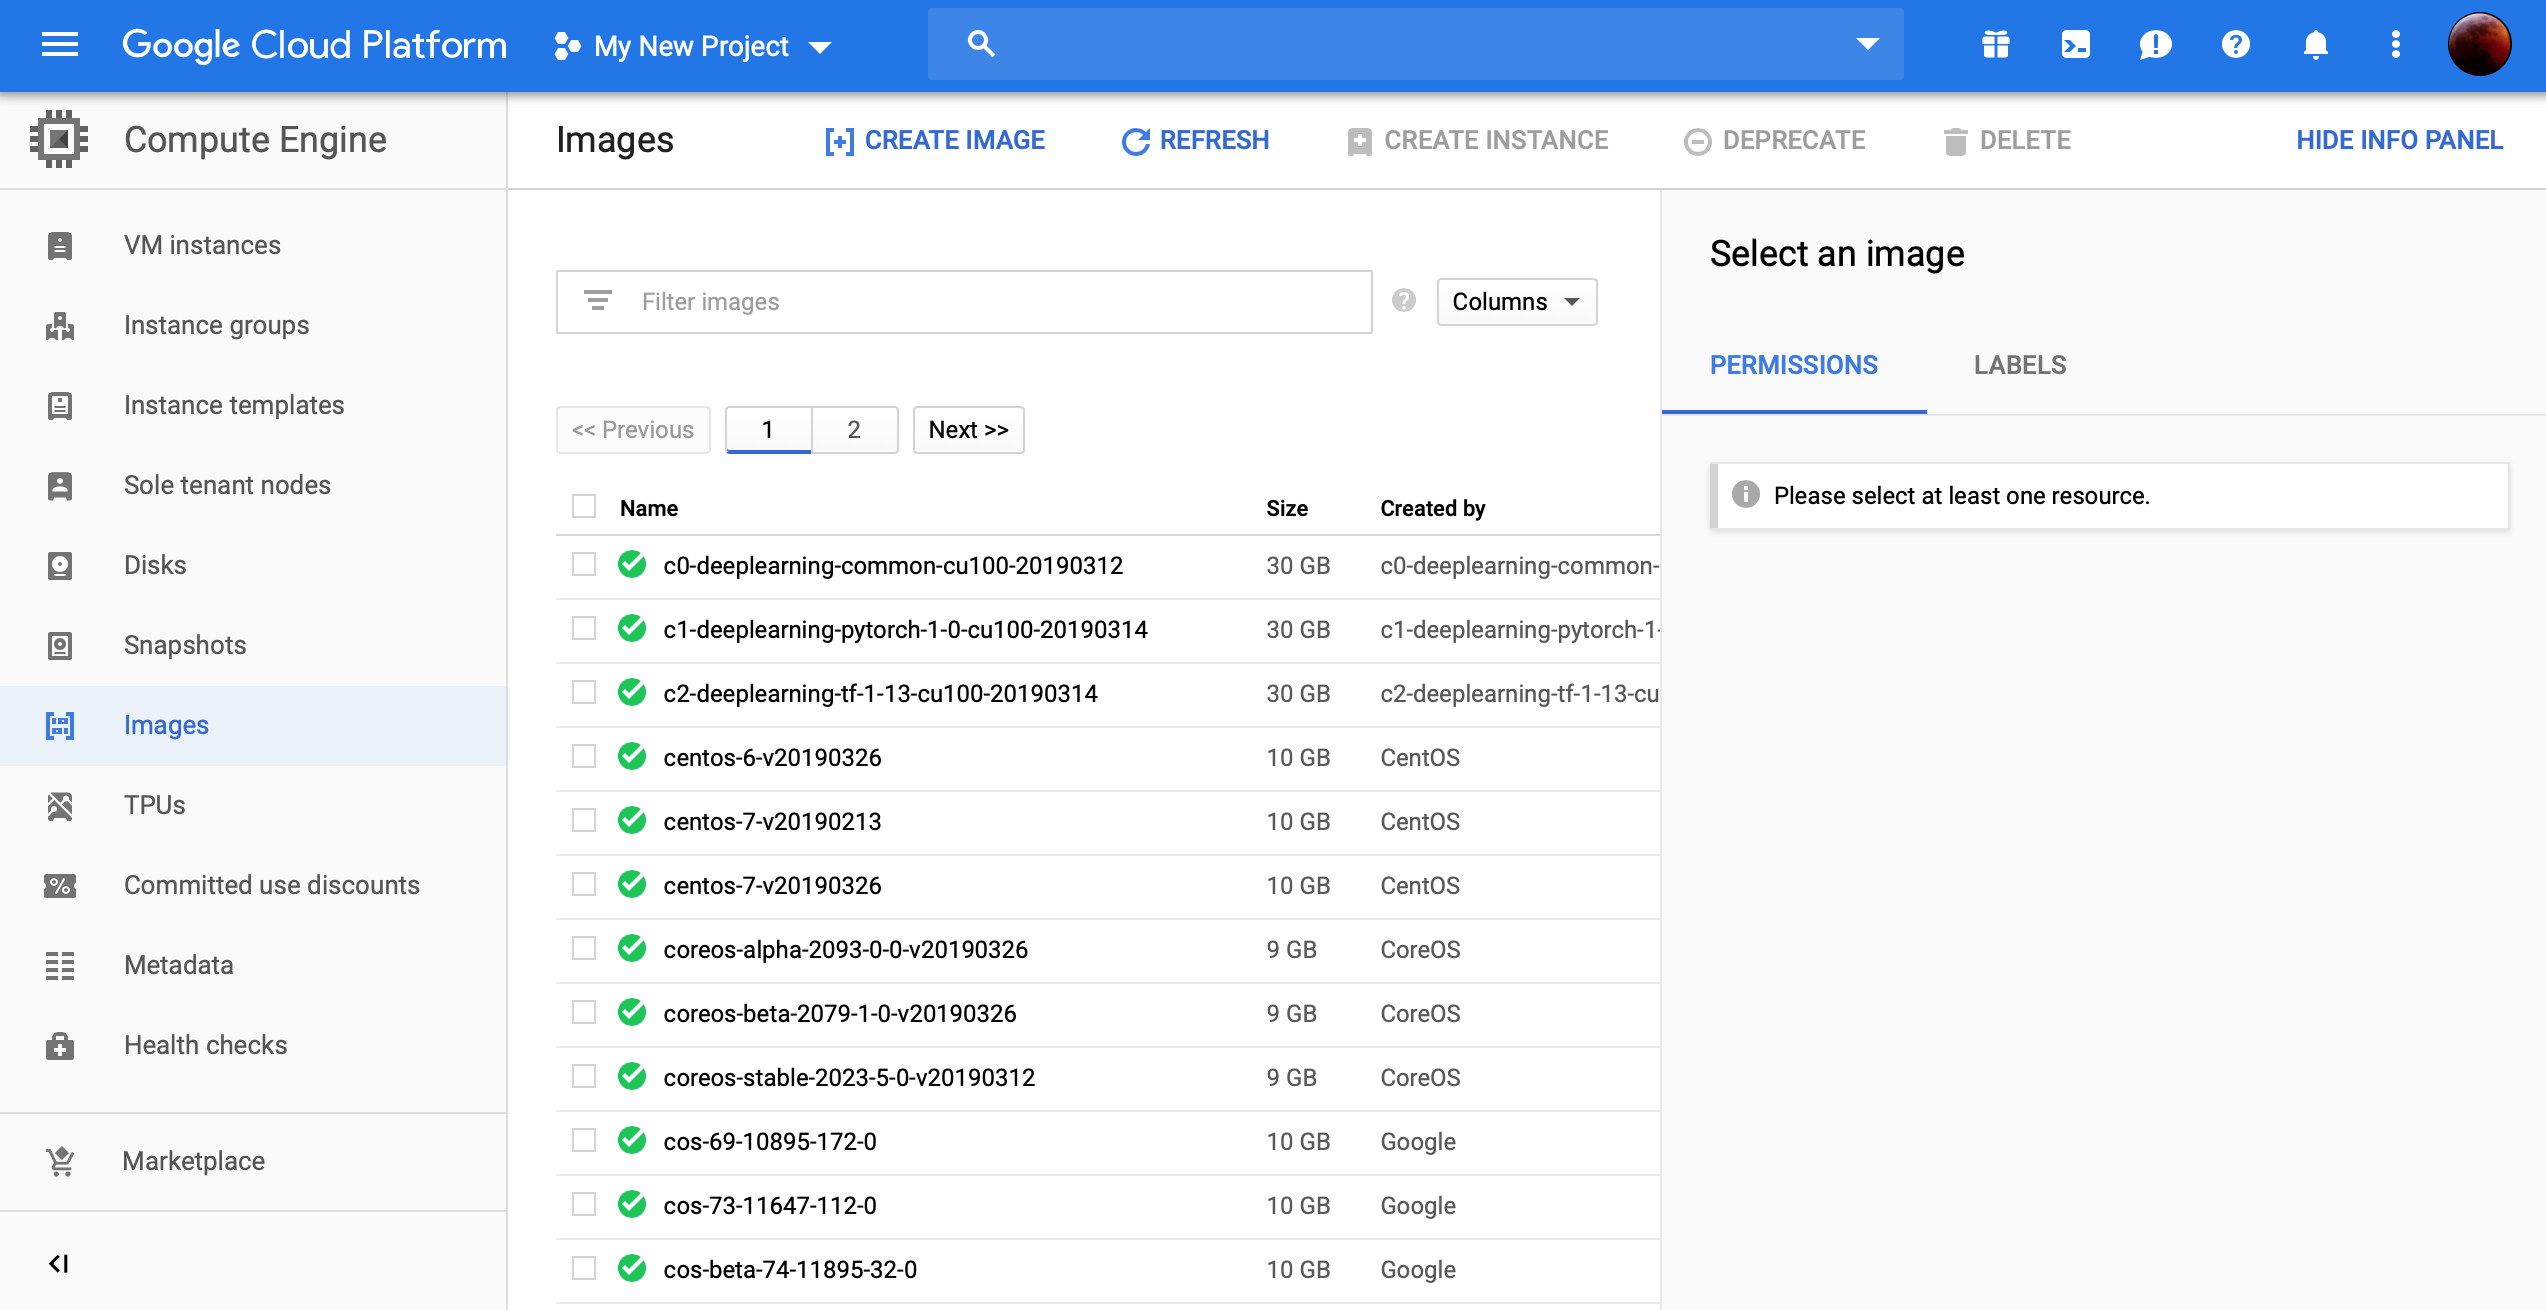
Once complete, you should see the following in your images list:

Note: If you have multiple projects, make sure the image is associated with your desired project, listed in the Created by column.
Create a Conductor Instance
To create a Conductor instance:
-
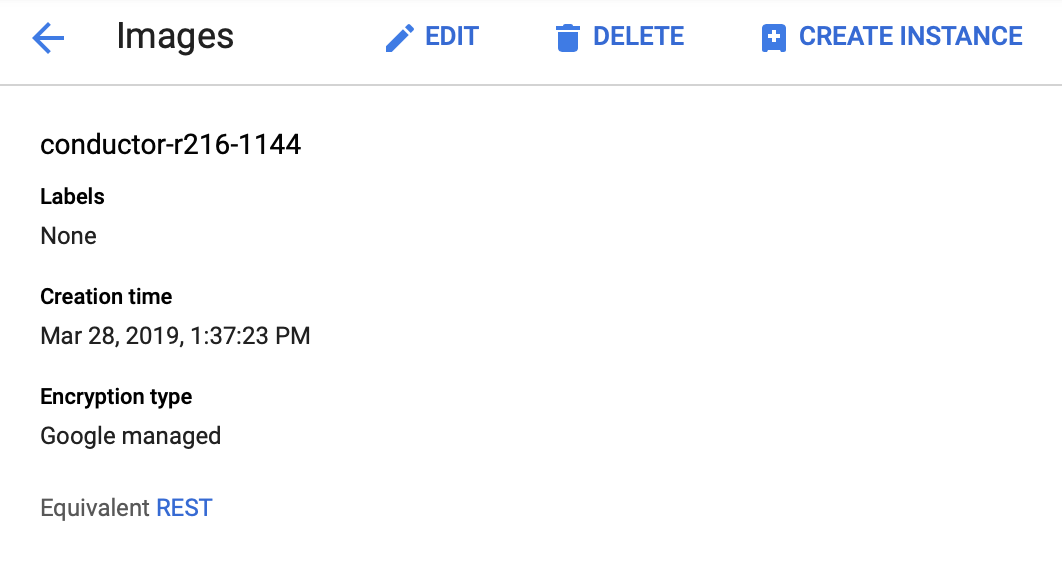
Select the image in the list by clicking on its name. You have several options
available: Select Create Instance.
-
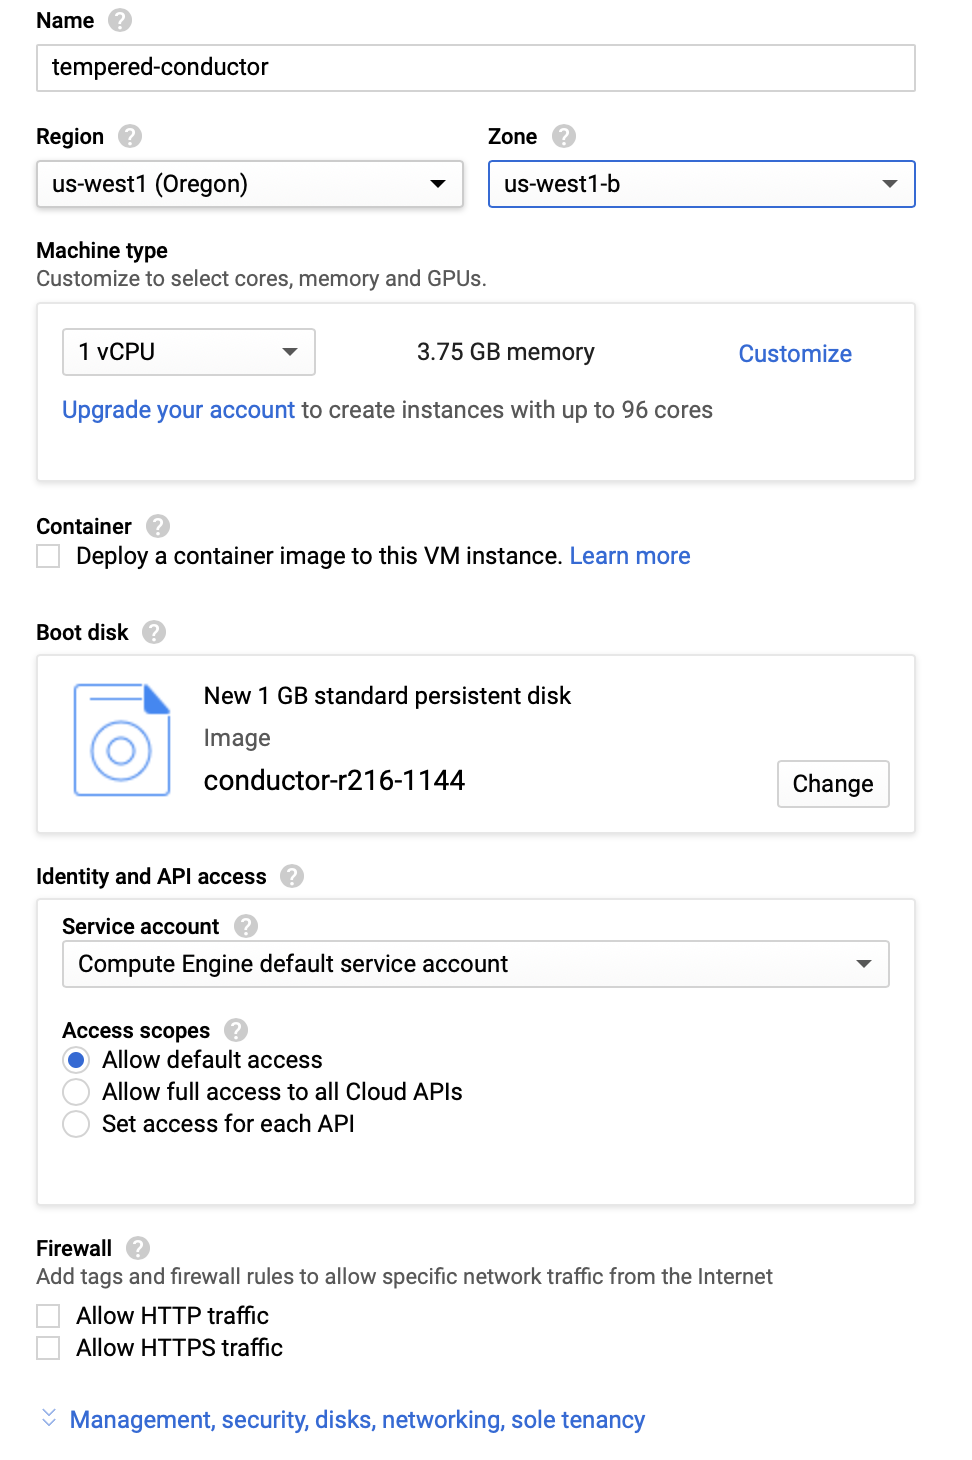
Fill in the Create an instance page with the following
information:
- Name
-
Enter a name of your choice, but it must be lower case and without spaces.
- Region
- Select the region of your choice from the drop-down.
- Zone
- Select the zone of your choice from the drop-down.
You can leave all other fields as is.
-
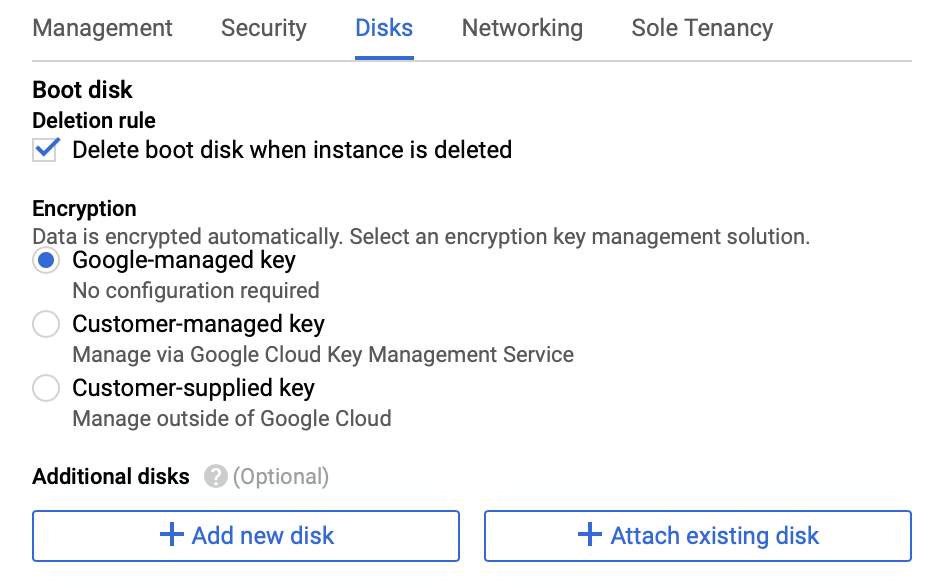
On the Disks tab, leave all settings as is and click
+ Add new disk.
-
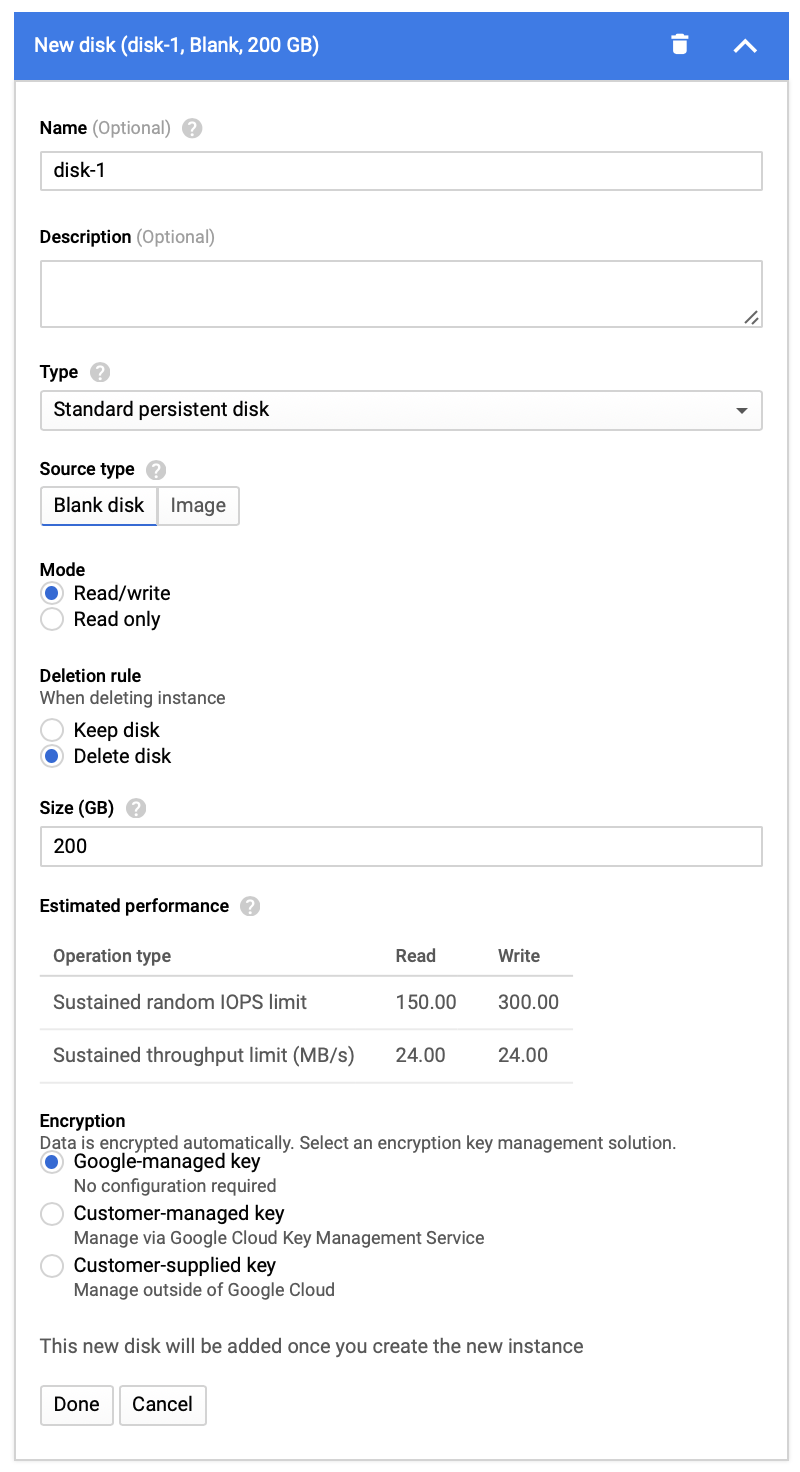
In the New disk dialog enter the following:
- Name
-
You can leave this field as disk 1, otherwise enter a name of your choice.
- Type
-
Select Standard persistent disk from the drop-down.
- Source type
-
Select Blank disk.
- Deletion rule
-
Select the Delete disk radio button
- Size (GB)
-
Enter the value 200
You can leave all other settings as is.
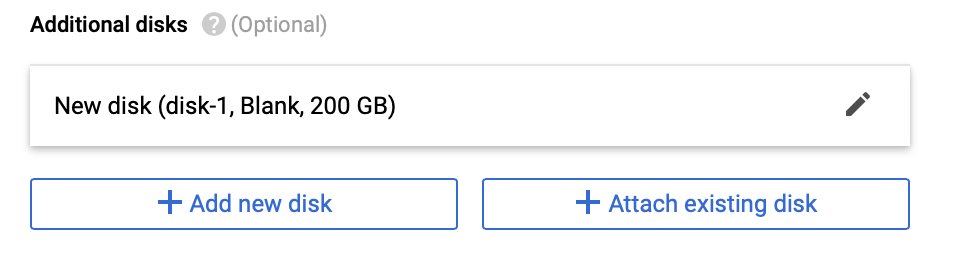
-
Click Done. The dialog will close, and you should see
the following:
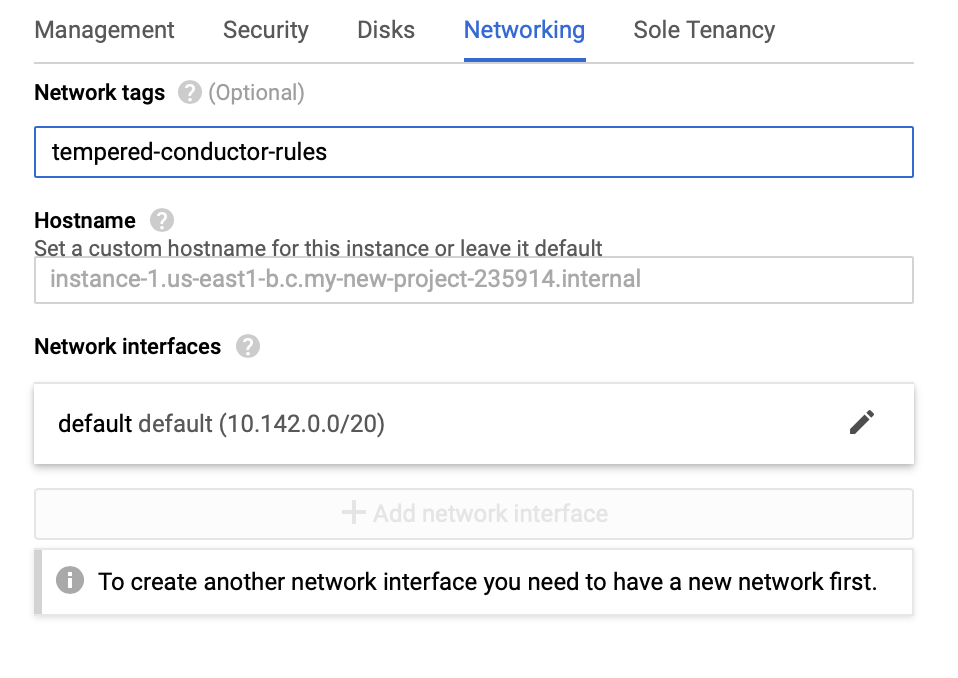
-
Click the Networking tab to the right of the
Disk tab and enter the tag name you created for your
firewall rules in step 3.
-
Click Create. It will take a moment to finish the
operation. Once complete, you should see the following:

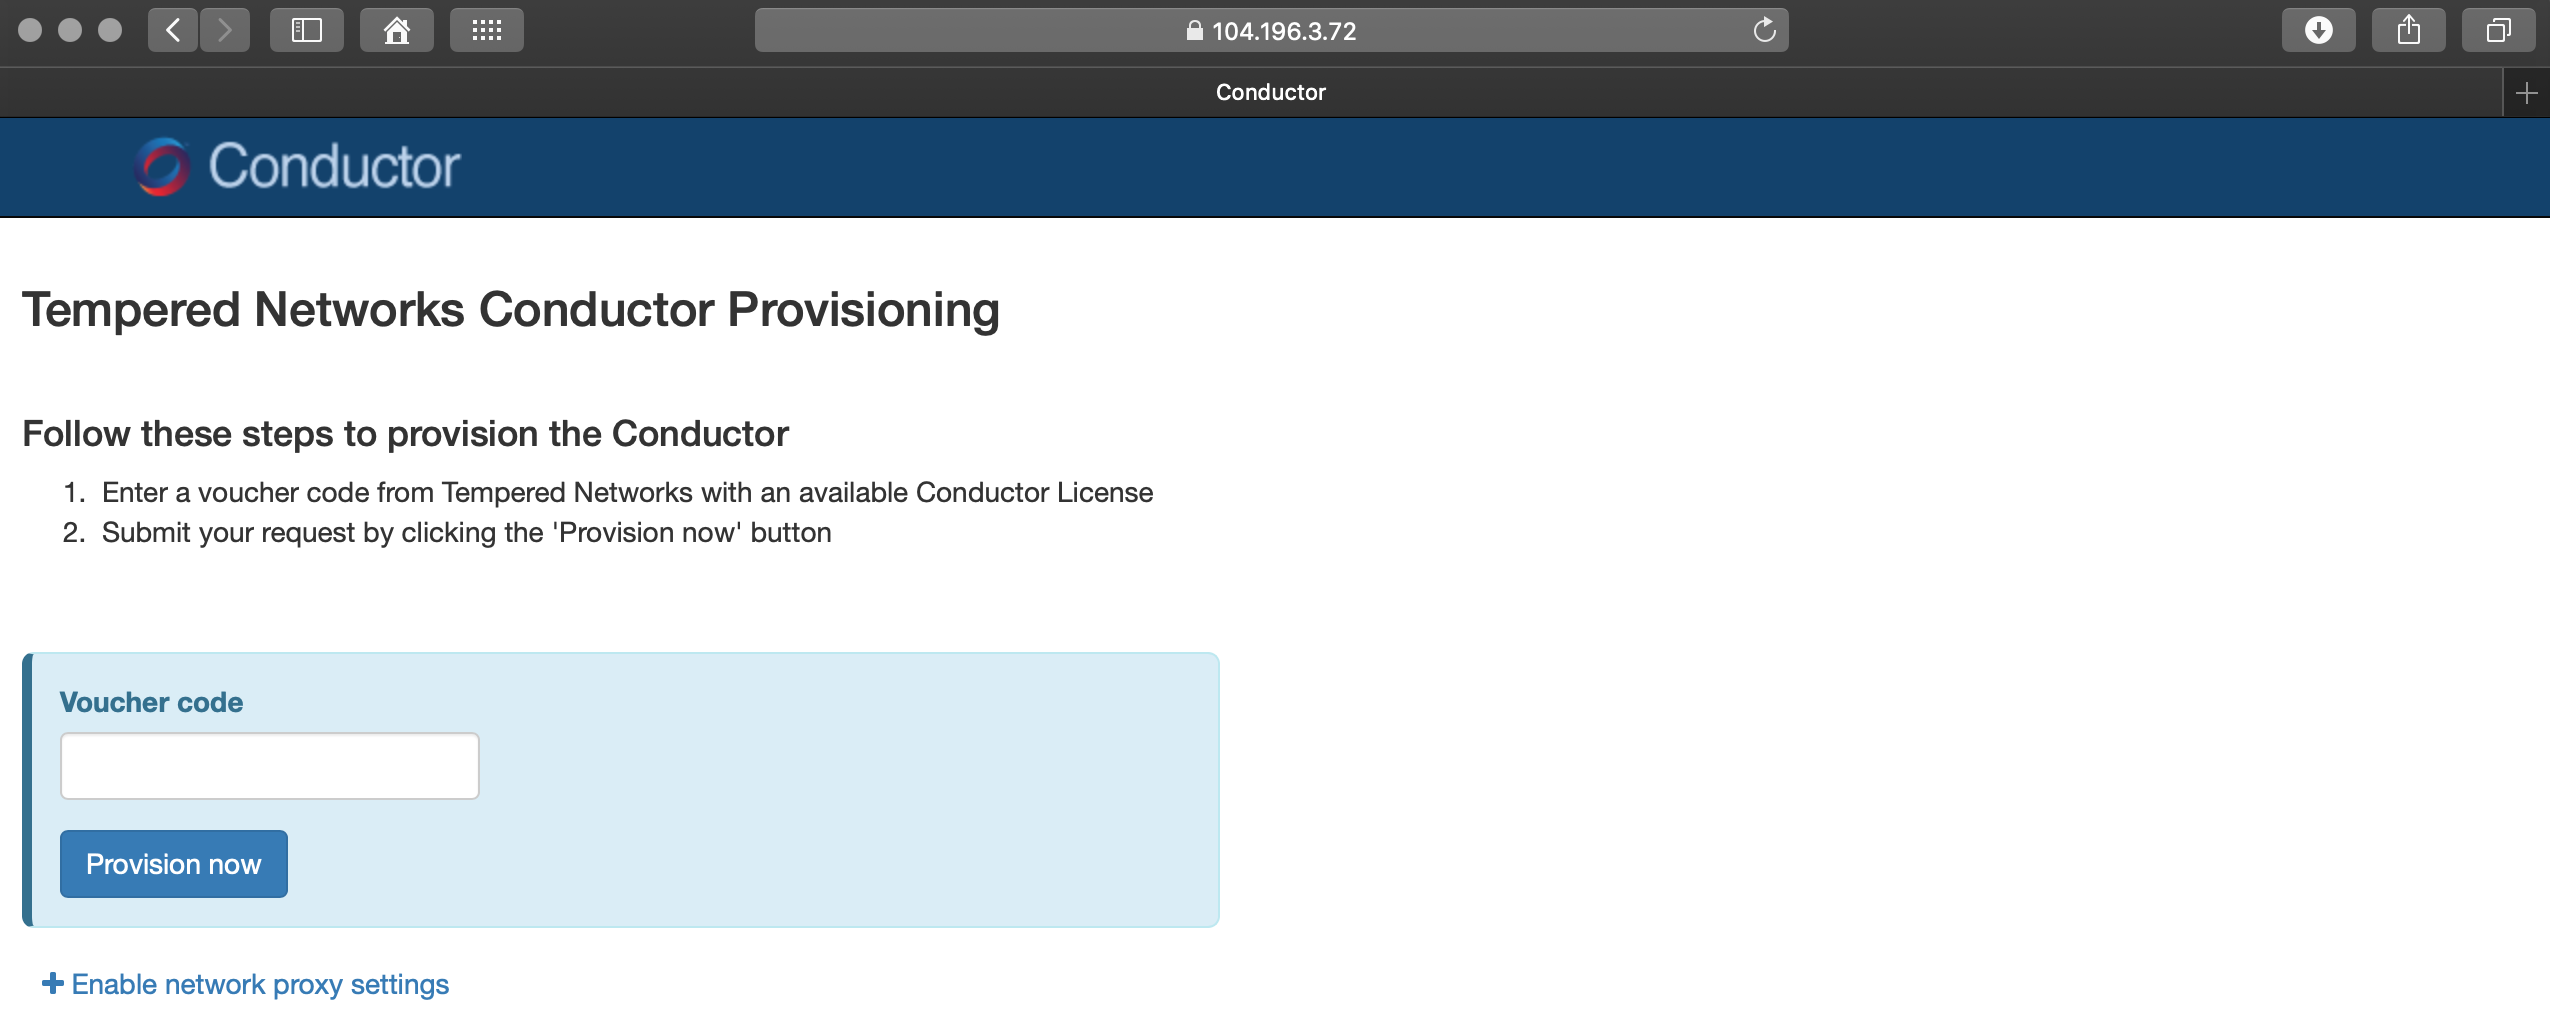
Note: The External IP for your instance is the address you will use to connect to the Conductor.
Verify the install
To verify the install:
-
An unlicensed Conductor
will display the initial Provisioning page for you to
enter your license voucher.
Additional Information
Once your Conductor is installed, you can configure and manage it as you would a physical Conductor. For additional help, you can search the Online Documentation by using the search bar at the top of the page or the navigation links to the left.