Set up a secure IPv6 overlay
You may want to set up IPv6 to provide encrypted communication to the IPv6 Internet or between Airwall Gateways, to secure IPv6 communication, and carry IPv6 traffic across an IPv4 only network.
- Supported Versions
-
v2.2.10 and later Conductor and Airwall Gateways
- Supported Airwall Edge Services
- v2.2.10 and later Airwall Gateways, plus any version of Airwall Relay since they do not decrypt traffic, they will relay IPv6 traffic.
- Required Role
- System and network administrators with permissions to the Airwall Gateways.
- L2 (aka subnet extension) – Having the same subnet behind multiple Airwall Gateways or multiple port groups on a single Airwall Gateway
The steps are:
- Configure an IPv6 static address for an Airwall Gateway
- Configure DHCPv6 (Optional if you configure a static IPv6 address and a default route to the Airwall's overlay IPv6 address on each IPv6 protected device)
- Discover devices, or create an /64 network object device on the Airwall Gateway
- Repeat steps 1-3 for other Airwall Gateways you want to communicate over IPv6.
- Set up an overlay and add trust between the /64 network object devices.
These steps are covered in more detail in the following sections.
Step 1: Configure an IPv6 static address
On an Airwall Gateway that supports IPv6, add an IPv6 overlay IP address:
- Go to Ports, select Edit Settings, and open an Overlay port group.
-
Set the following options:
- IP addresses – Select Static. If you need to add an address, click the plus (you can have both IPv4 and IPv6 static addresses assigned).
- Type – Select IPv6.
- IP address – Enter a /64 block and assign the overlay IPv6 address (best practice is to use ::1):
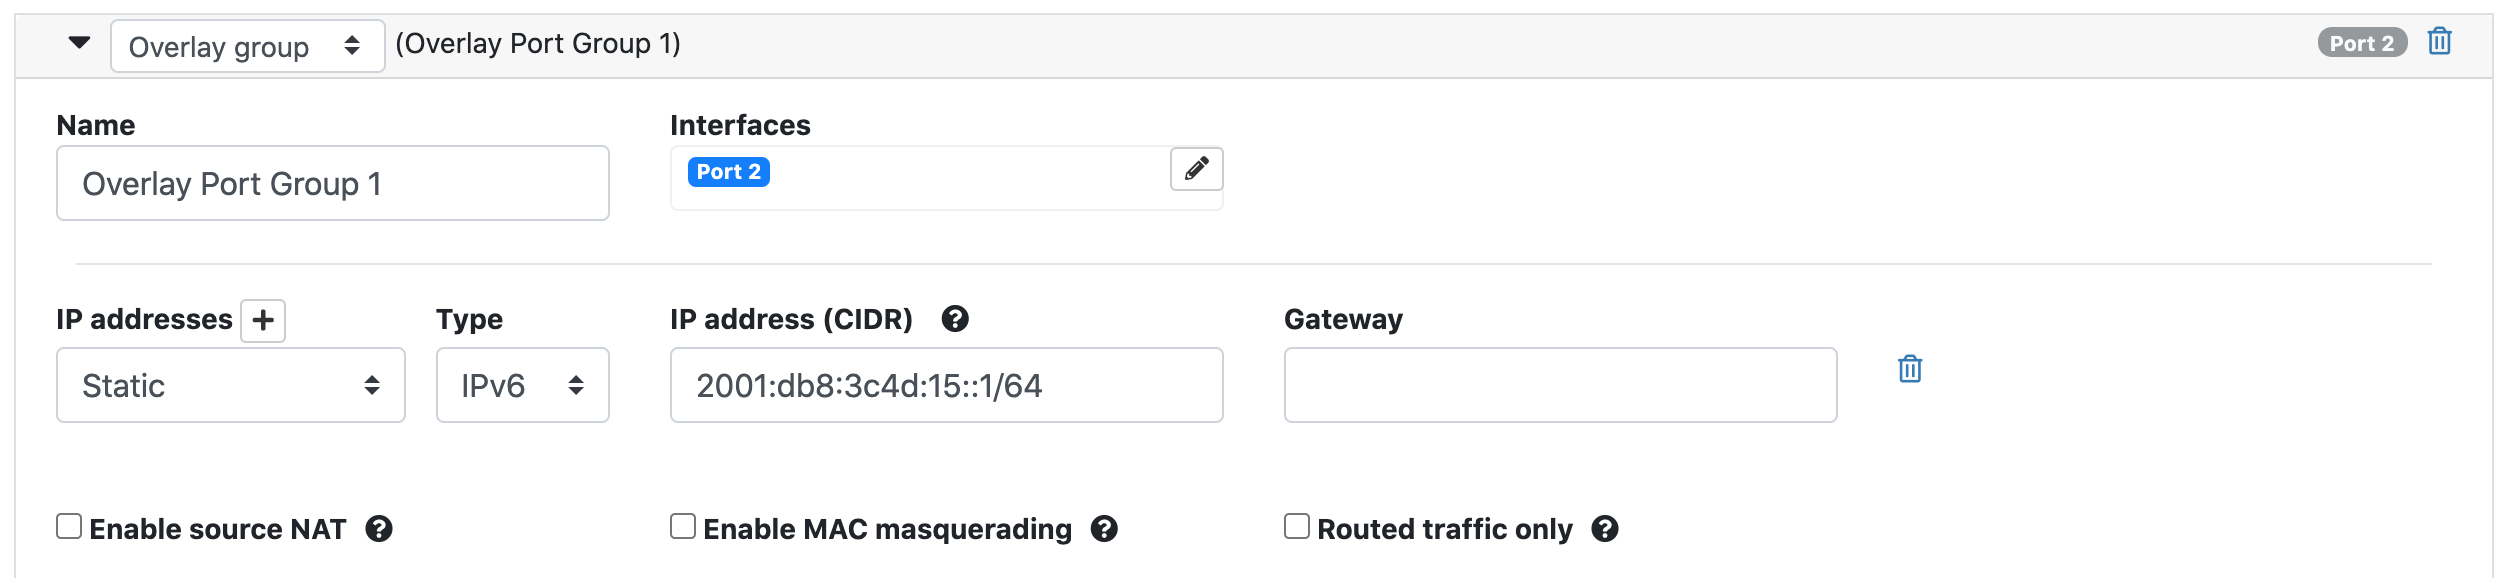 Note: Assign unique IP addresses for each Airwall Gateway you set up.
 - Select Update Settings.
Step 2: Configure DHCPv6
On the Airwall Gateway, configure your DHCP settings for DHCPv6:
- Next to DHCP settings, select Configure.
-
Enter your DNS servers and Domain. The rest should be filled in for you.
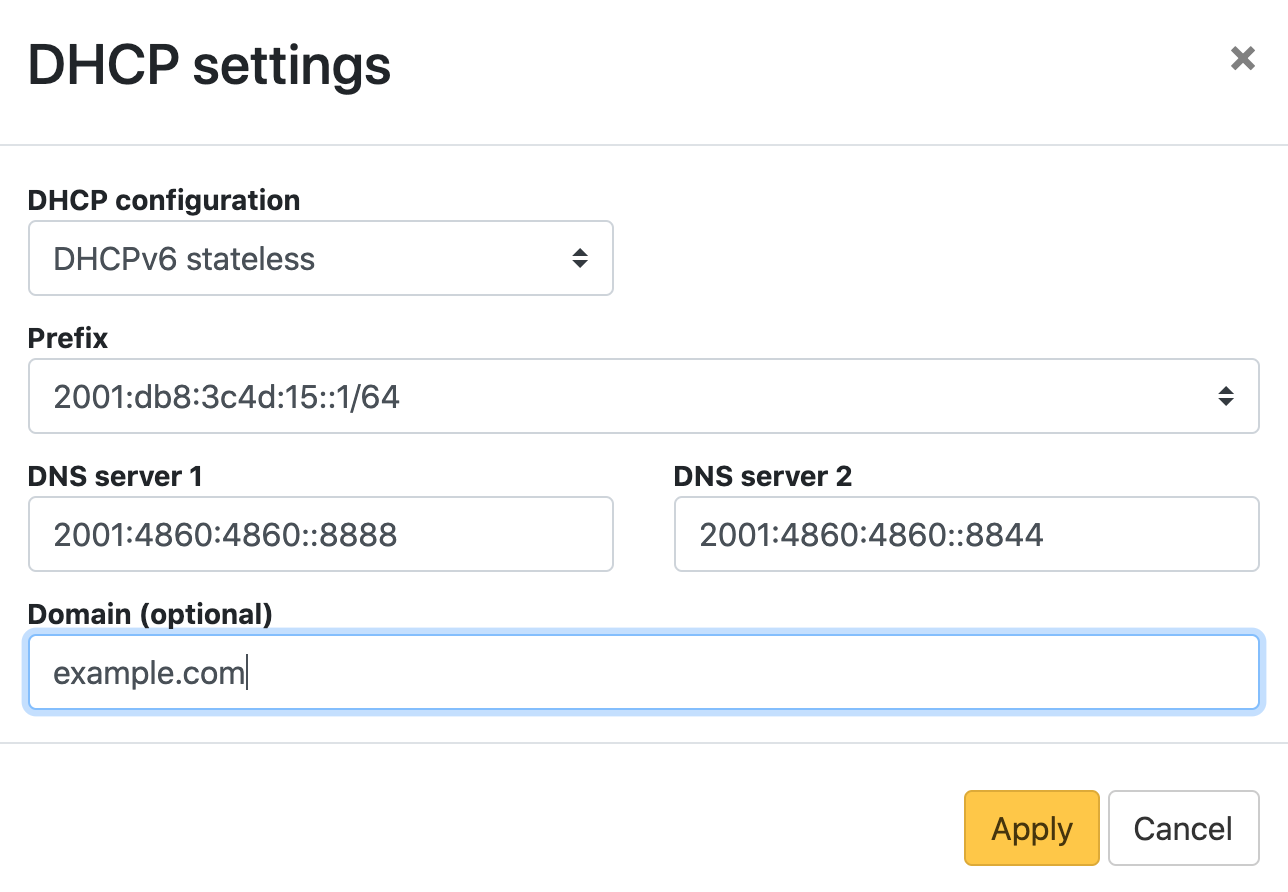
- Select Apply.
Step 3: Discover devices, or create a /64 network object
You can wait for automatic device discovery to detect IPv6 devices and accept them, or you can create an IPv6 network object if you do not need to set policy for individual devices. If you choose to discover and accept individual IPv6 devices, be aware that the devices may have IPv6 privacy extensions enabled that cause the device to obtain a new IPv6 address frequently (approximately every 15 minutes).
To create a IPv6 network object device on the Airwall Gateway for your local /64 network:
- Go to Local devices.
- Select Add device.
-
Under Overlay device IP, enter the static IPv6 IP
address you set up on the Overlay
port group:
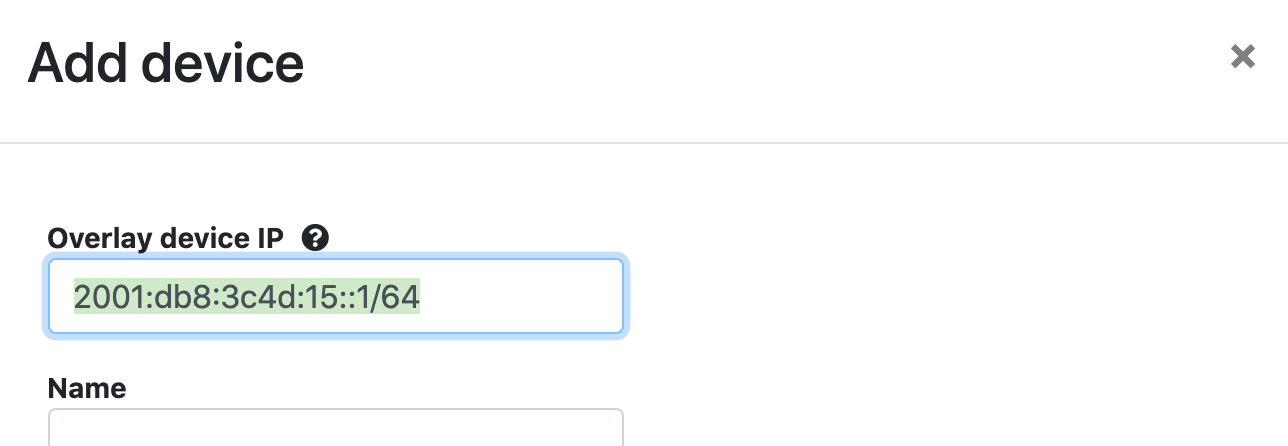
- Fill in other device details, and then select Create.
Step 4: Repeat for one or more Airwall Gateways
Step 5: Set up trust between IPv6 devices
Add the IPv6 network objects (or discovered IPv6 devices) to an overlay, and set up trust between them. See Creating an overlay network and Adding and removing device trust.

Result
- Obtain an IPv6 address
- Use the Airwall Gateway as their IPv6 default gateway
- Communicate with each other