Put an Airwall Gateway into diagnostic mode
With an Airwall Gateway in diagnostic mode, you can troubleshoot it by collecting diagnostic information and you can also manage a variety of settings such as IP addresses, logs, and firmware.
-
Follow the instructions for your model:
- Airwall Gateway 75 / ESPRESSObin - Place into diagnostic mode by
connecting your computer to the micro-USB console port and using airsh
to enter
diag. - Airwall Gateway 100, 110, 150, 200, and 250 series - Place into diagnostic
mode by pressing and holding the multi-purpose or reset button for only
three seconds. Immediately release the button. Important: Do not continue pressing the multi-purpose or reset button after three seconds as this will reset the Airwall Gateway to factory settings.
After three seconds, the status LED blinks to indicate the Airwall Gateway is in diagnostic mode. For more information about LED blink patterns, Status LED Blink Codes.
- Airwall Gateway 300, 400, and 500 series - Place into diagnostic mode by
connecting a VGA monitor and a USB keyboard to port 2 of the Airwall Gateway, and at the login prompt:
- 2.2.3 and later: Enter
airshto enter the console, and then enterdiag.Note: If you're asked for a password, enter the default passwordairsh, or the password you set. - Earlier than 2.2.3: Enter
diagthen enter the passworddiag.Once the Airwall Gateway is in diagnostic mode, Overlay network communications from the Airwall Gateway are disabled and device network is reconfigured with a static IP address.
- 2.2.3 and later: Enter
- Airwall AV3200g - Place into diagnostic mode by pressing and
holding the Reset button for 6 seconds. Immediately release the button
when all the LED lights blink off. The status LED
 blinks to
indicate the Airwall is in diagnostic mode.Important: Do not hold the reset button for longer than 8 seconds as this will reset the default factory configuration.
blinks to
indicate the Airwall is in diagnostic mode.Important: Do not hold the reset button for longer than 8 seconds as this will reset the default factory configuration. - Airwall AV3033 - Place into diagnostic mode with the Airwall's LCD screen and buttons.
- Airwall Gateway 75 / ESPRESSObin - Place into diagnostic mode by
connecting your computer to the micro-USB console port and using airsh
to enter
- Connect a computer to one of the device network ports (typically port 2 and above).
-
Open a web browser and go to http://192.168.56.3 to
access the Airwall Gateway
diagnostic page.
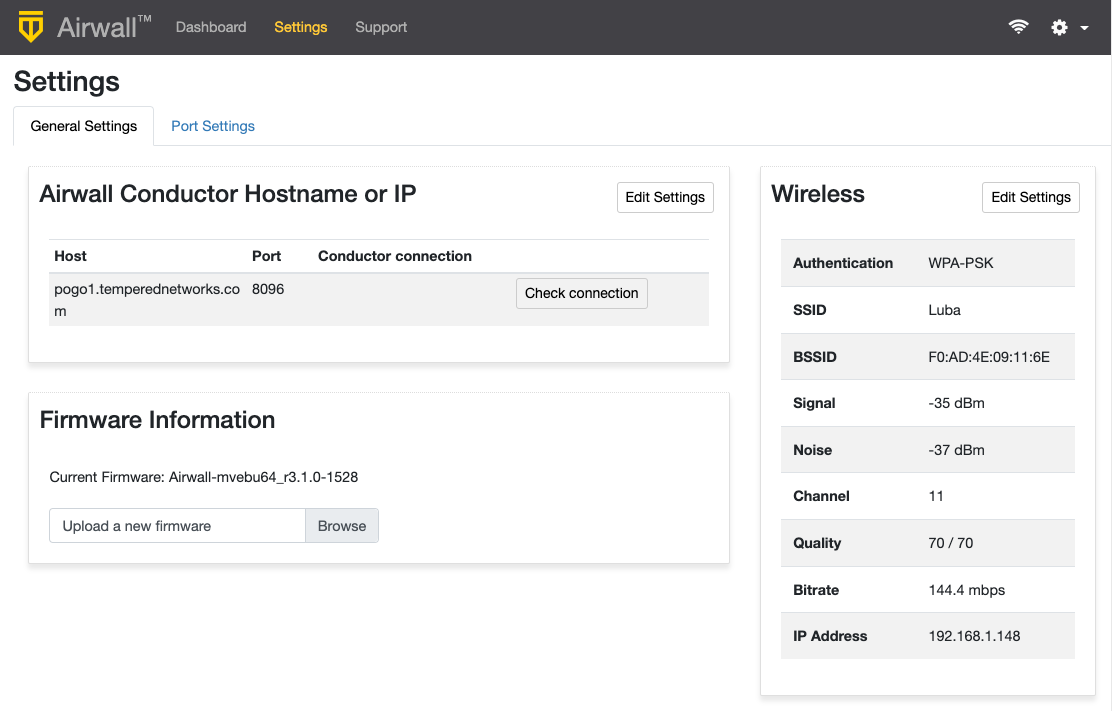
- To edit the Conductor, next to Airwall Conductor Hostname or IP, select Edit Settings. Make your selections and select Update Settings
-
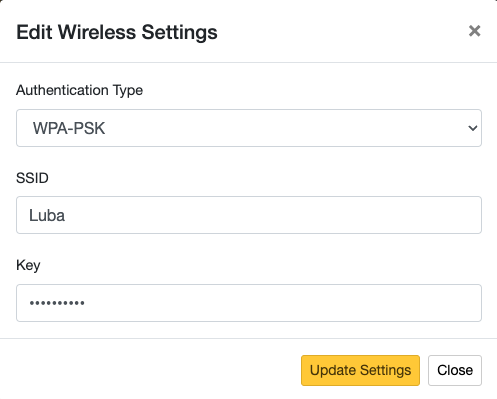
To edit Wireless (Wi-Fi) settings, next to Wireless, select Edit Settings. Make
your selections and select Update Settings.
For more information on console commands, see Airshell (airsh) Command Reference. See also Connect an Airwall Gateway with Diag mode.