Airwall Gateway Hardware Installation Guide
This is a generic installation guide for all Airwall Gateway hardware appliances series: 75, 110, 150, 250, and 500. For more specific installation instructions, specifications, and panel layouts for your specific model, download the platform guide from Documentation Downloads.
Follow this guide to set up basic network connectivity for an Airwall Gateway, and provision the gateway on the Airwall Conductor. The Conductor is the central configuration and management point for your Airwall secure network, and manages trust between devices and Airwall Gateways on your network. These instructions are based on Airwall Gateways and Conductor v2.2.8 and later.
Prerequisites
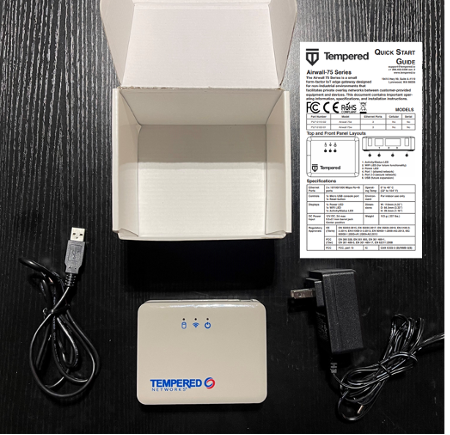
To bring the Airwall Gateway online, you need:
- the Conductor IP address or URL that the Airwall Gateway connects to
- network cables to connect the Airwall Gateway to your network, or a valid SIM card if you are only connecting via a cellular network
- a micro-USB cable to connect a computer to the Airwall GatewayNote: If your Airwall Gateway model does not have a micro-USB console port, use a network cable to connect to your computer's ethernet port. If your computer does not have ethernet port, use a RJ45-to-USB cable.
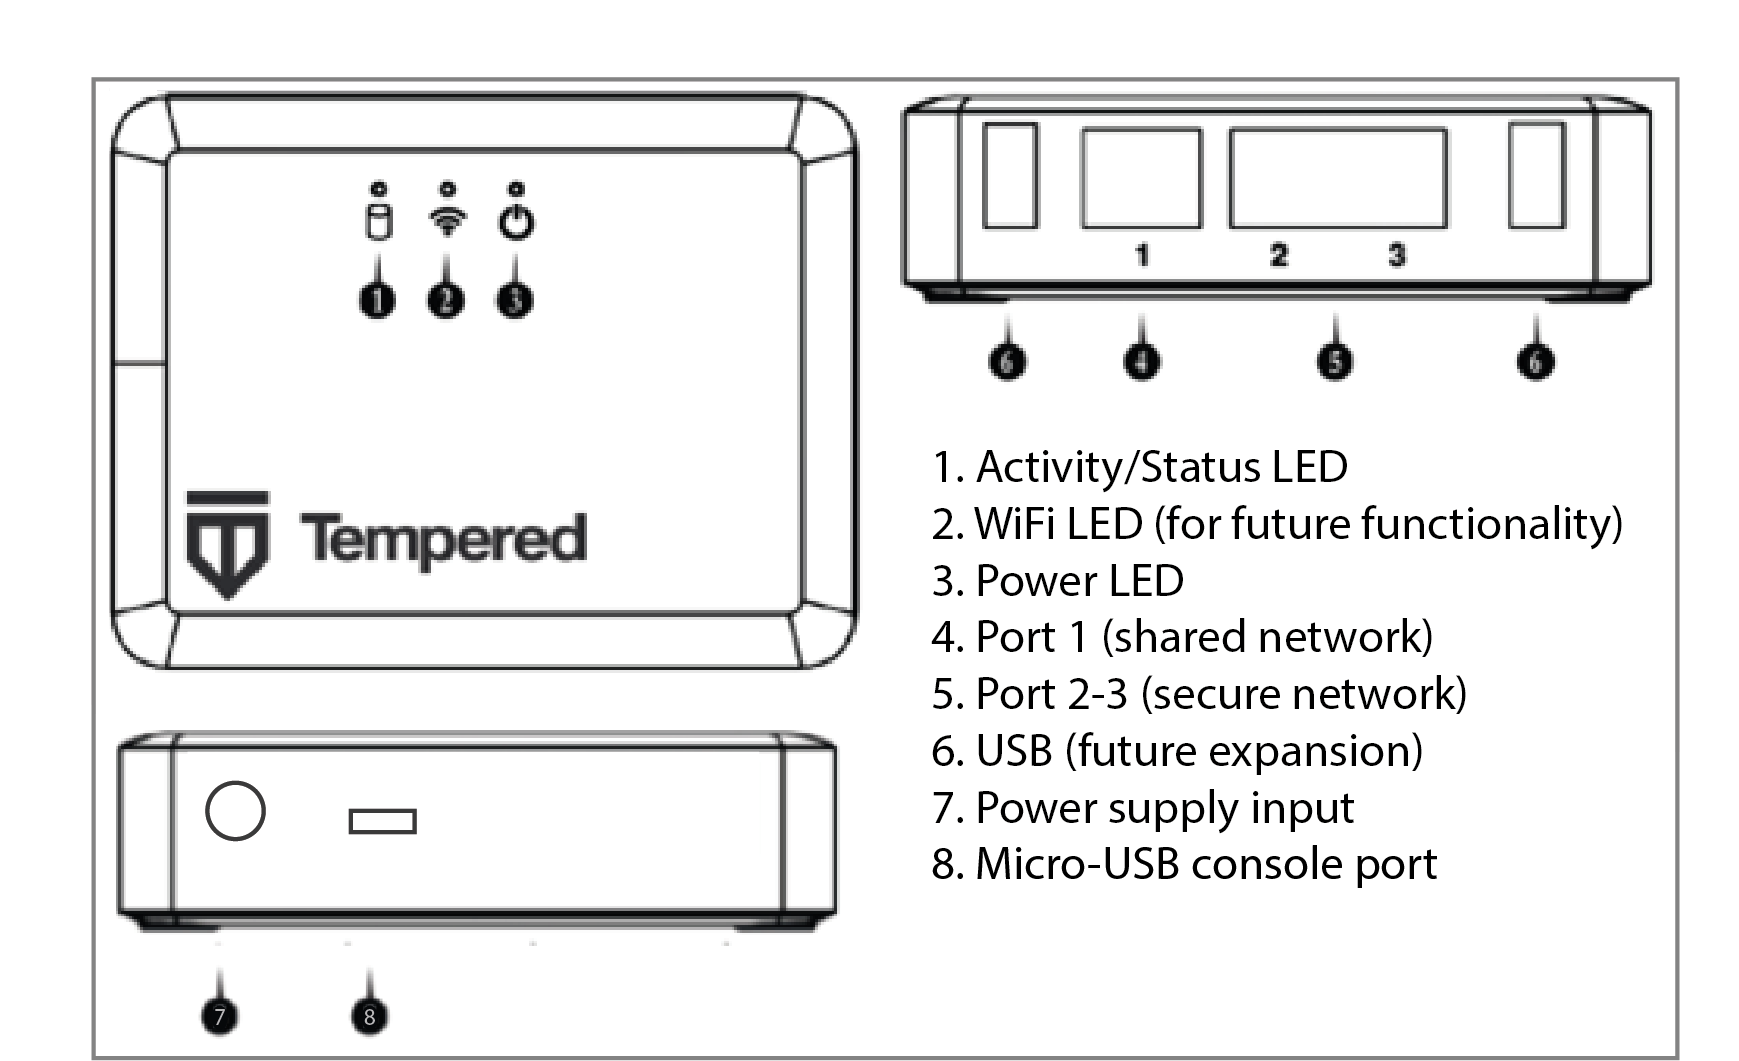
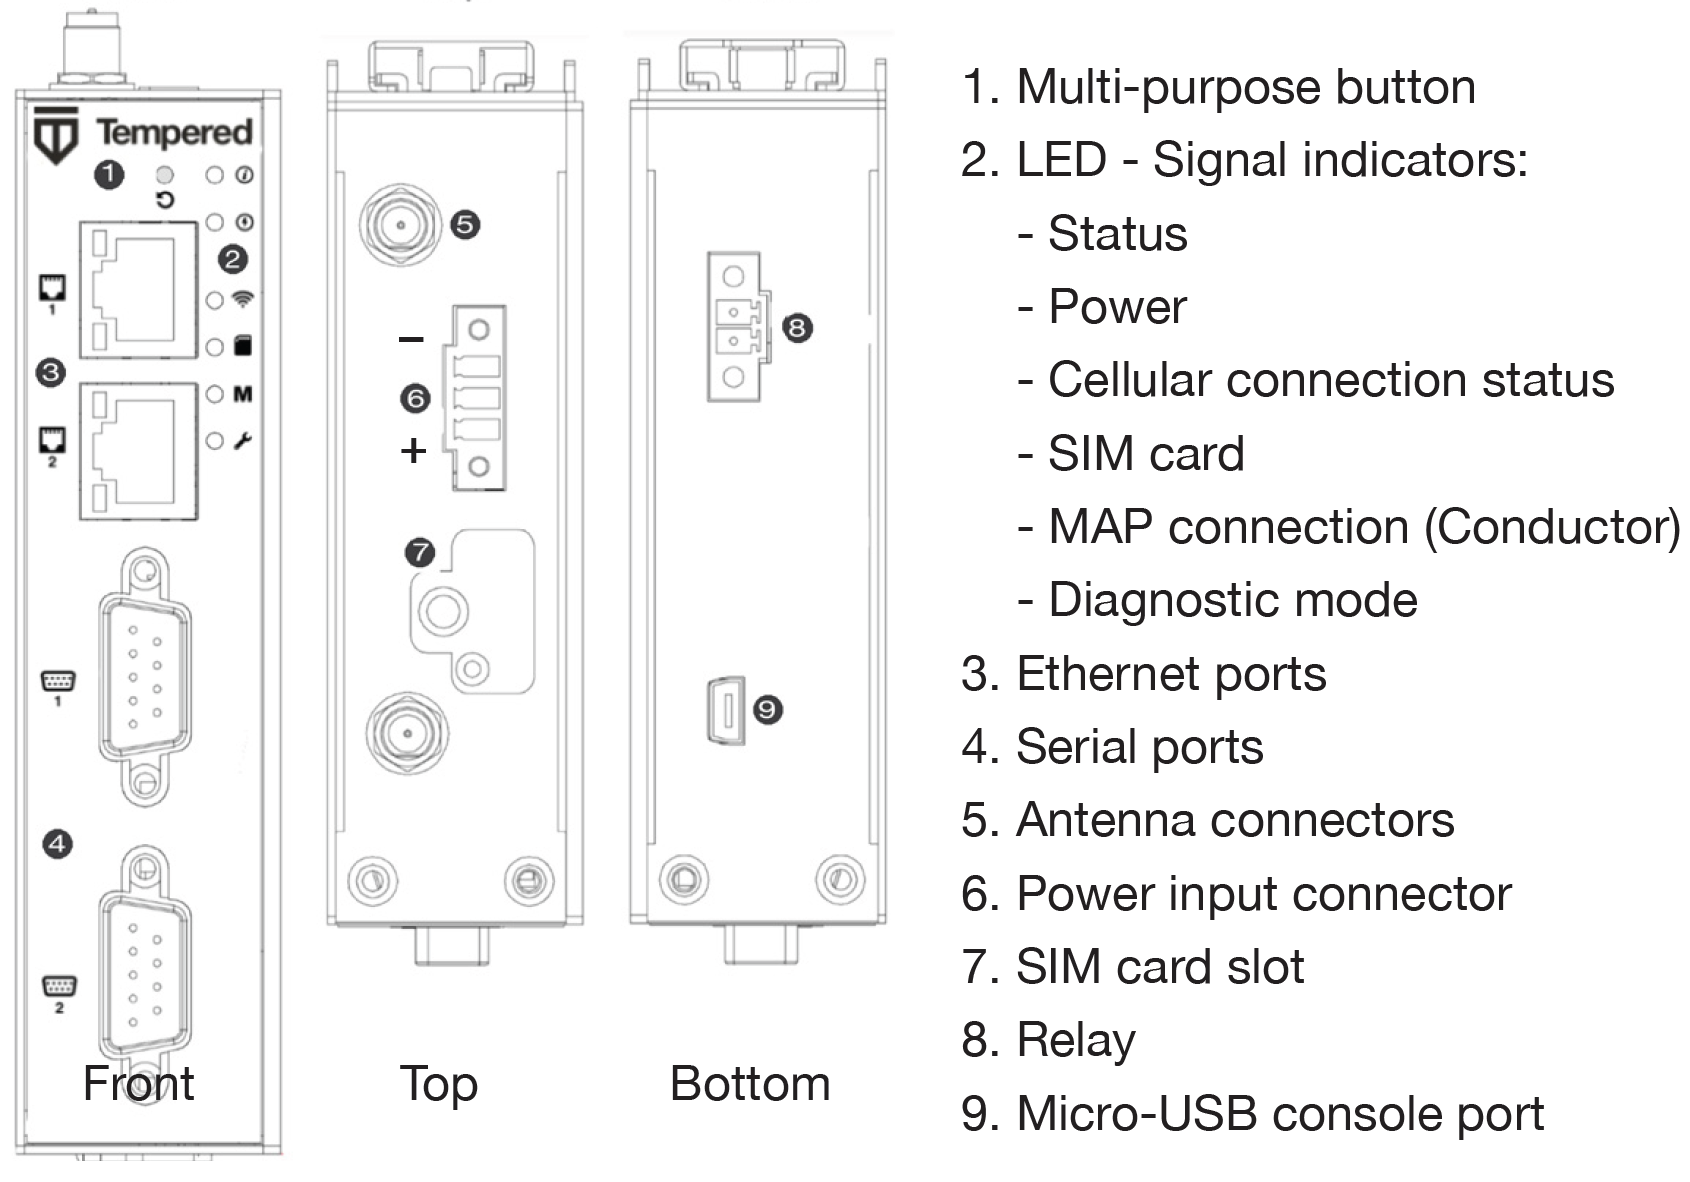
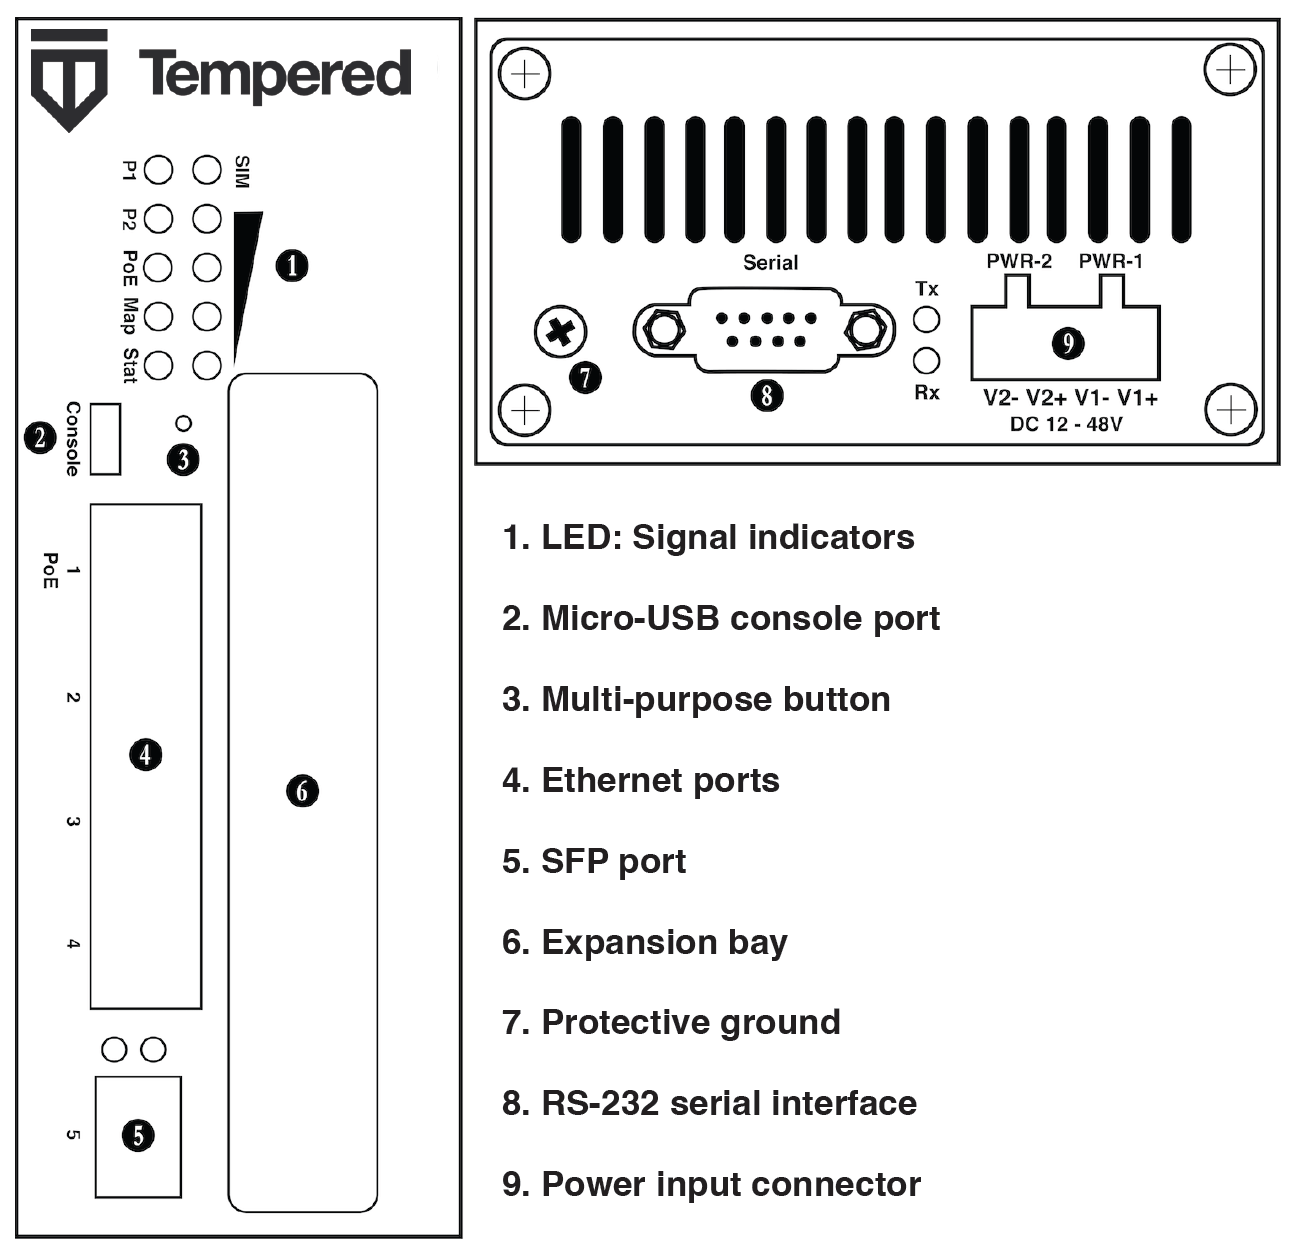
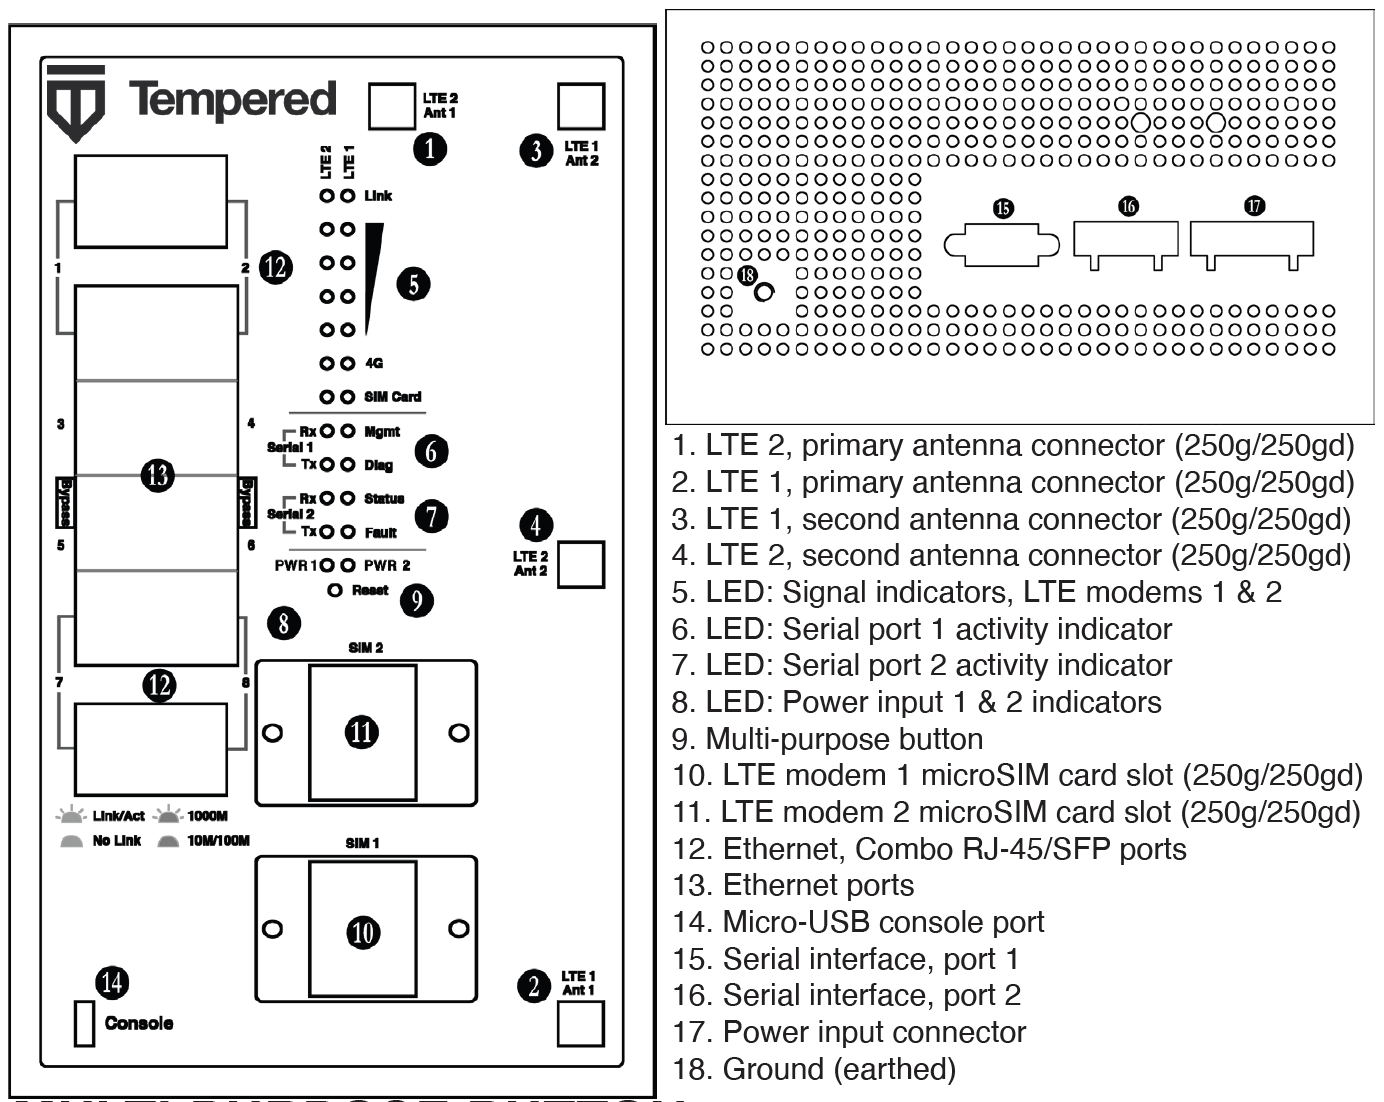
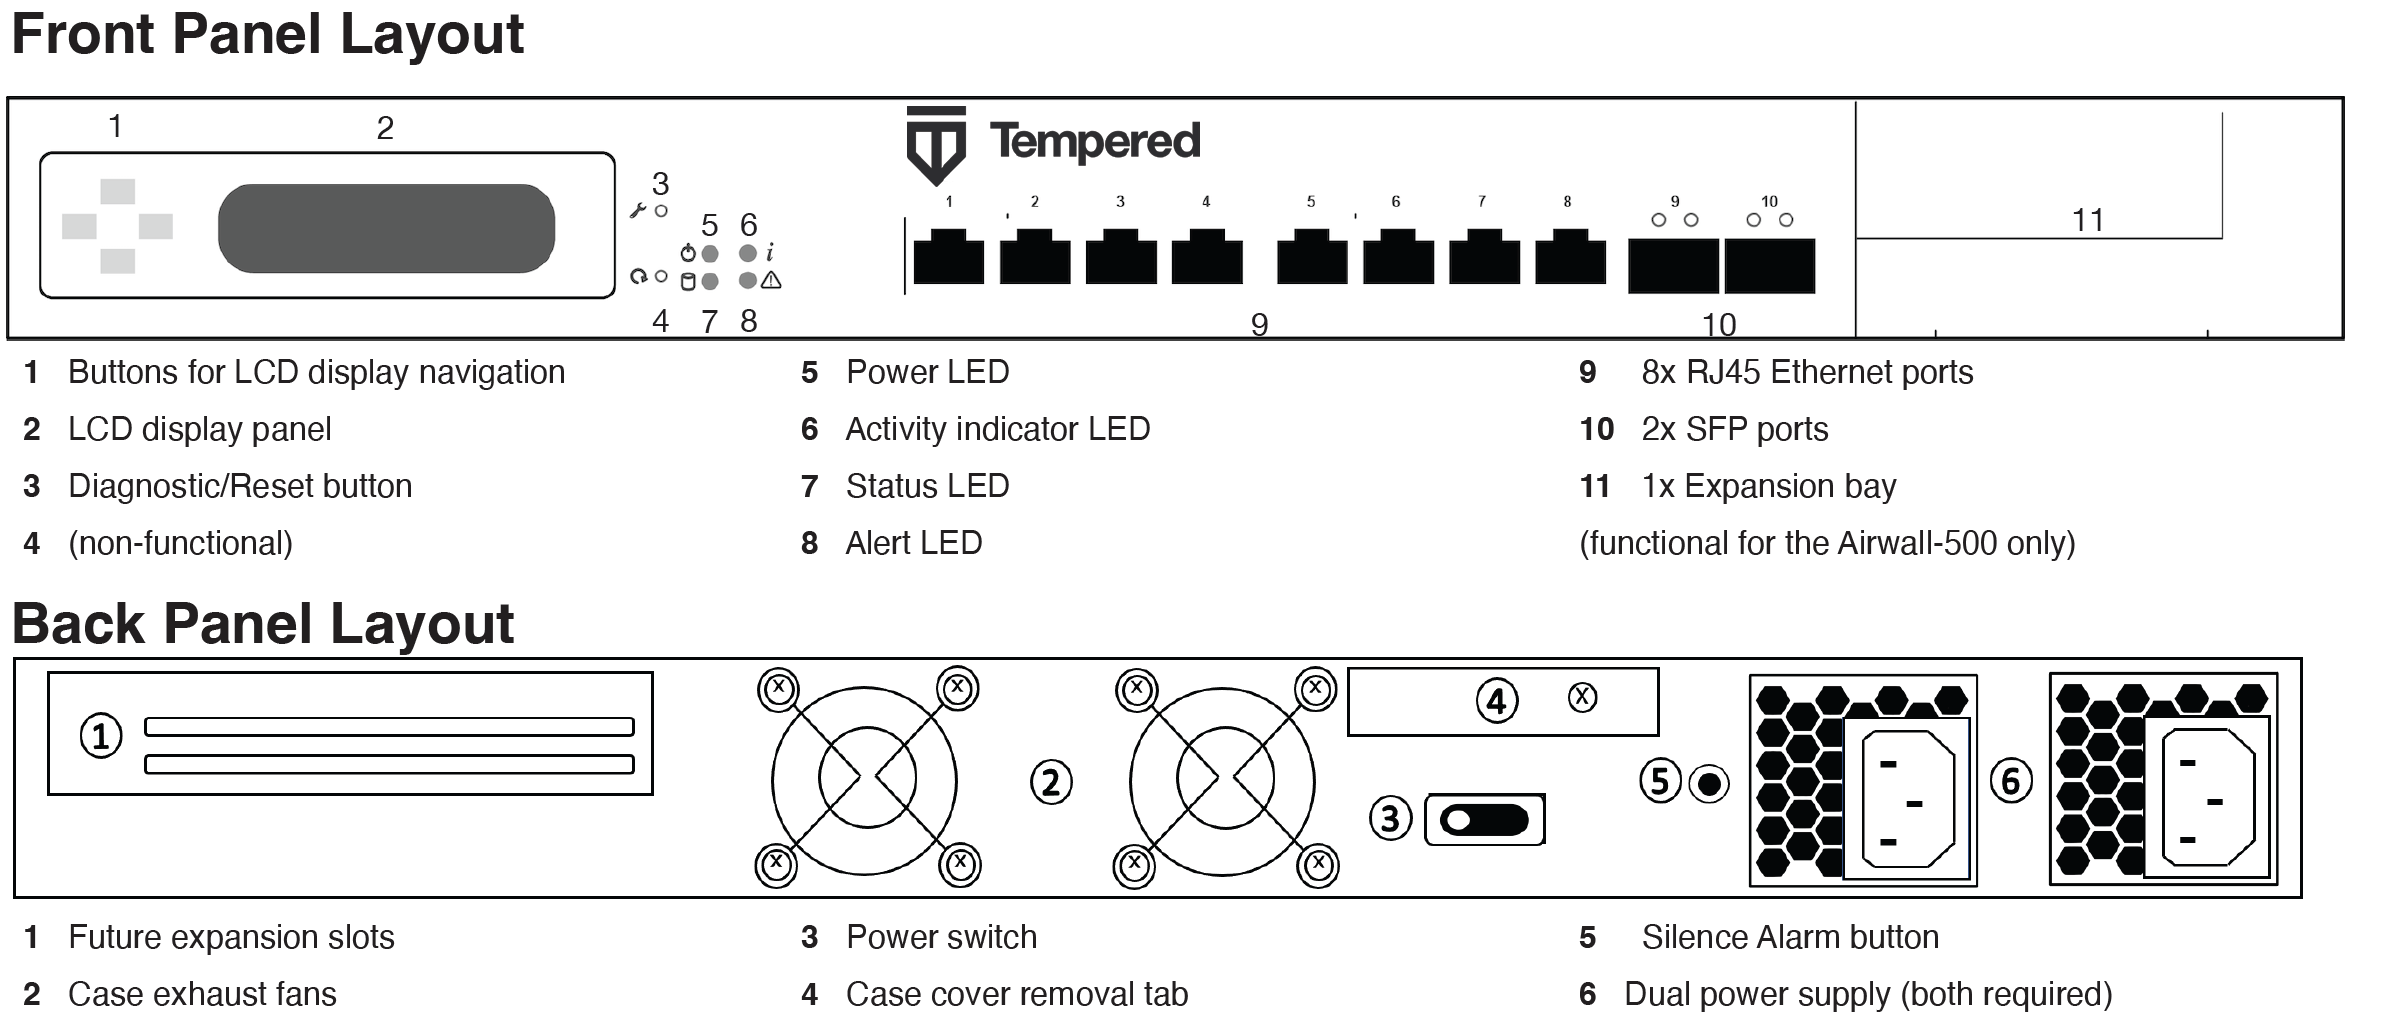
Airwall Gateway panel layout
Connecting the Airwall Gateway to the network and the Conductor
Connect the Airwall Gateway to your network.
- Console Port connect – Best option for Airwall Gateway series with a console port.
- Diagnostic mode connect – Best option for Airwall Gateway series without a console port.
- Use a DHCP server – Advanced option for adding a large number of Airwall Gateways, see Connecting Airwall Gateways using a DHCP server.
Connecting with the console port
- Locate the Airwall Gateway in an area that complies with the safe operating guidelines, and then plug it in with the supplied power cord.
- Connect the Airwall Gateway to a network that has access to the Conductor (your company network or the Internet) using Port 1.
- Connect your computer to the micro-USB console port on the Airwall Gateway.
- Use a terminal (macOS or Linux) or terminal emulator such as PuTTY (Windows), to connect to the Airwall Gateway using baud rate 115200.
-
At the login prompt, log in using Airshell with name
airshand no password. -
Check that the Airwall Gateway can reach the Conductor URL:
ping <Conductor URL>For example:
ping my-conductor.tempered.comWhen the ping is successful, continue.
-
Set the Conductor IP address or URL, and optionally, the port. For example, enter:
The Airwall Gateway is now recognized in the Conductor, showing up in the Provisioning tab, the Licensing tab, or on the Airwalls page as ready to manage. When the Airwall Gateway is connected to the Conductor, you can manage and configure it from there.conductor set my-conductor.tempered.com - Connect the devices you want to protect to the Airwall Gateway on Port 2. See the platform guide that came with your Airwall Gateway for port locations.
Connecting through diagnostic mode
- Locate the Airwall Gateway in an area that complies with the safe operating guidelines, and then plug it in with the supplied power cord.
- Connect the Airwall Gateway to a network that has reachability to the Conductor (your company network or the Internet) using Port 1.
- Connect your computer to Airwall Gateway's Port 2 with an ethernet cable.
-
For Airwall Gateway series:
- with a multi-purpose or reset button, press the button for 3 seconds to enter diagnostic mode. After three seconds, the status LED blinks to indicate the Airwall Gateway is in diagnostic mode.
- without a multi-purpose or reset button, place into diagnostic mode
by connecting a VGA monitor and a USB keyboard to port 2 of the
Airwall Gateway, and entering the login prompt enter
airshto enter the console, and then enterdiag.Note: If you are asked for a password, enter the defaultairsh, or the password you set.
Once the Airwall Gateway is in diagnostic mode, Overlay network communications from the Airwall Gateway are disabled and the device network is reconfigured with a static IP address.
-
Open a web browser and go to
http://192.168.56.3to access the Airwall Gateway diagnostic page.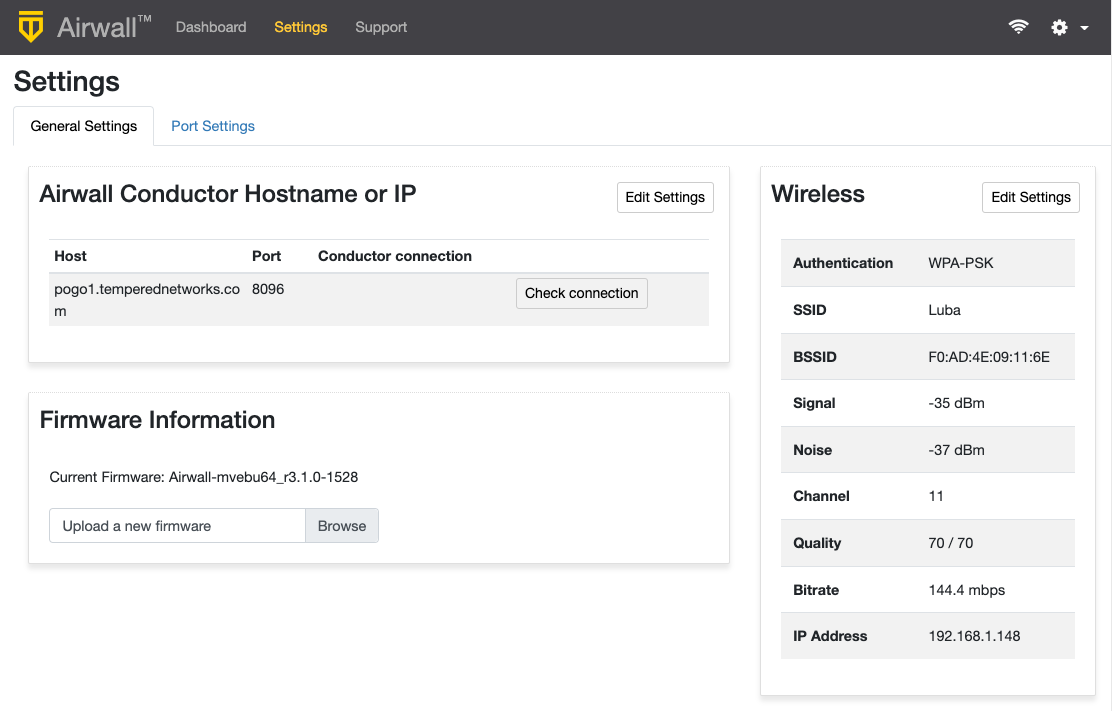
- Select Edit Settings and enter the Conductor URL or IP. Select Update Settings.
-
Click Reboot to take the Airwall out of diagnostic
mode.
Important: After restarting, the Airwall Gateway may require up to three minutes to return to operating mode.The Airwall Gateway is now recognized in the Conductor, showing up in the Provisioning tab, the Licensing tab, or on the Airwalls page as ready to manage. When the Airwall Gateway is connected to the Conductor, you can manage and configure it from there.
- Connect the devices you want to protect to the Airwall Gateway on port 2 and above.
License and Manage the Airwall Gateway in the Conductor
You need to Add Airwall Edge Service Licenses to the Conductor before you can provision and license Airwall Gateways. Airwall Edge Services include Airwall Gateways as well as Airwall Agents that allow people to connect their devices to your Airwall secure network.
To complete this step, a Conductor administrator must license and manage the Airwall Gateways. For instructions, see Provision and License Airwall Edge Services.
Once complete, Conductor administrators can configure the Airwall Gateways in the Conductor.