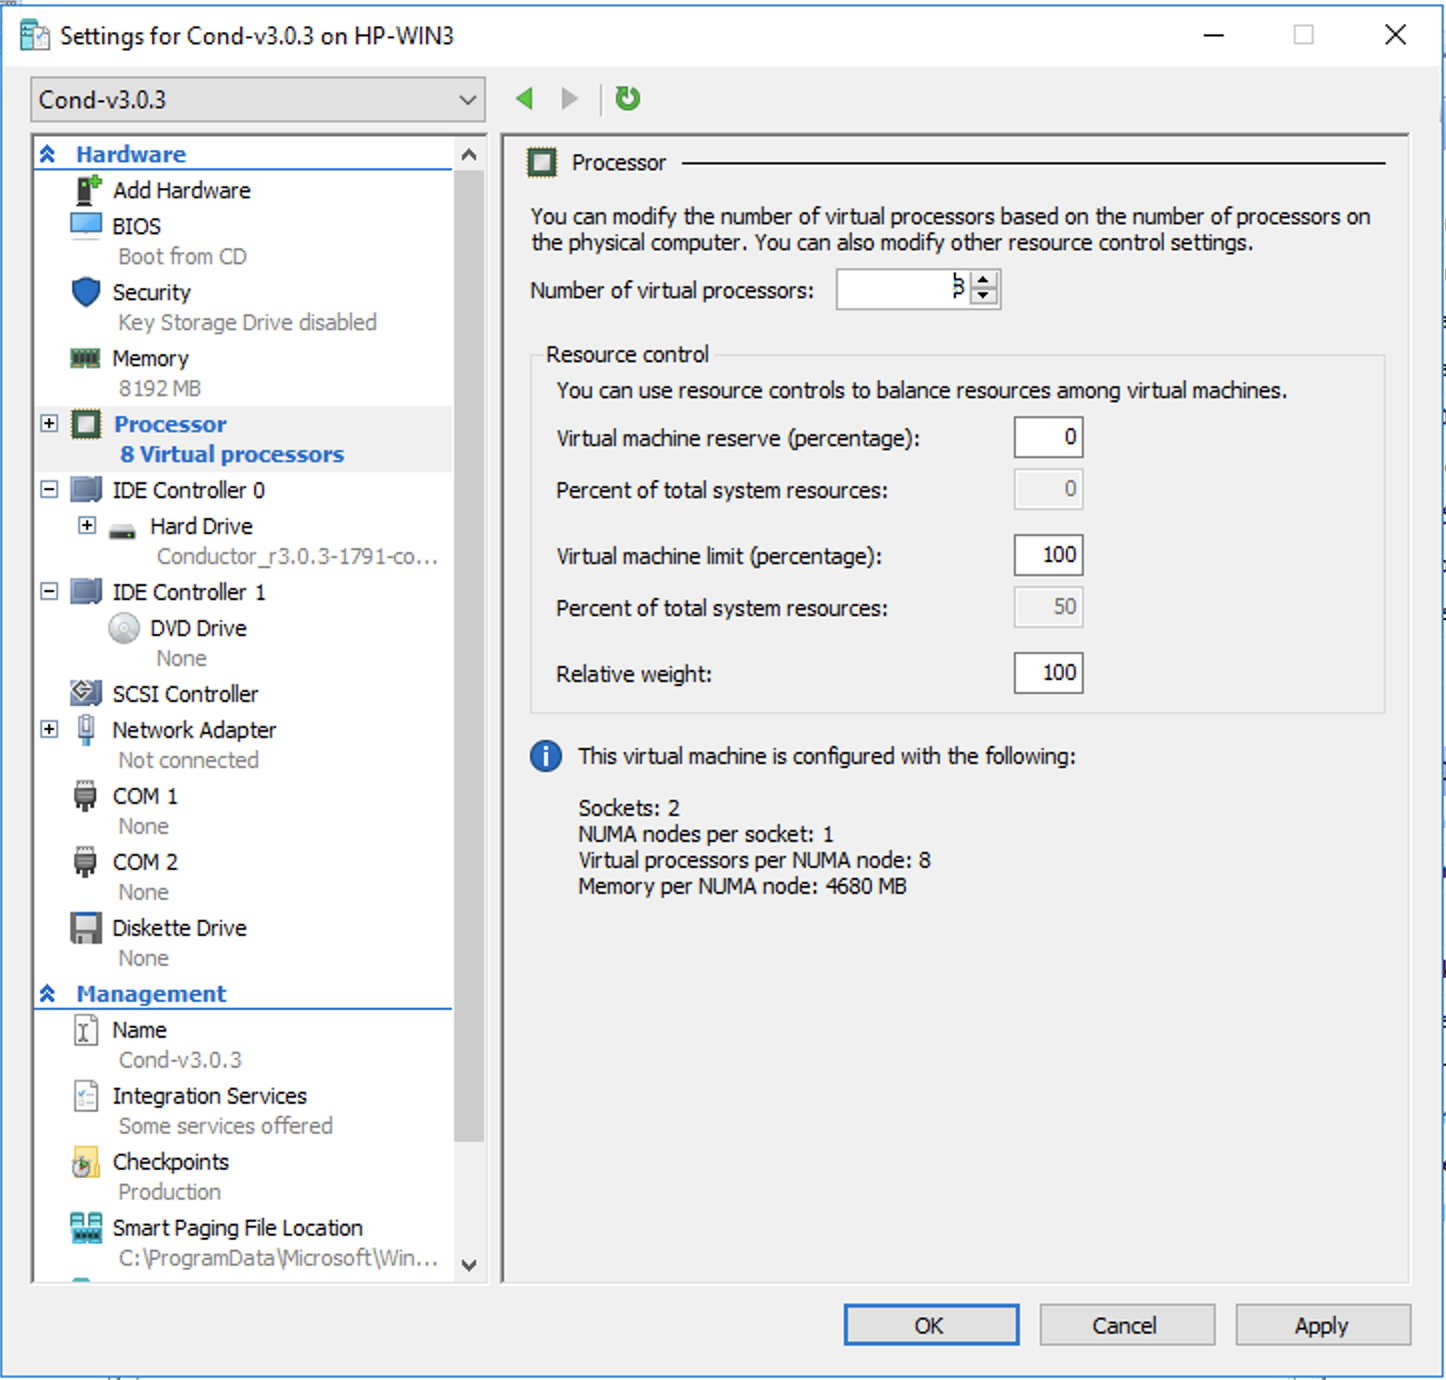
Step 2: Configure the Conductor virtual machine
- With the new virtual machine selected, on the right, select Settings.
-
Open Processor, and under Number of virtual
processors, select 8. Select Apply.
- Open IDE Controller 0. Select Hard Drive, then Add. This is a second hard drive for the data partition.
-
Configure a new Virtual hard disk for the data partition – On the
Hard Drive page, under Virtual hard
disk, select New and configure the
drive:
- Choose Disk Format – Select VHDX. Select Next.
- Choose Disk Type – Select Fixed Size. Select Next.
- Specify Name and Location – Enter a descriptive name, and keep the default location. Select Next.
- Configure Disk – Select Create a new blank virtual hard disk and for Size, enter 15 GB. Select Next.
- Summary – Check your details, and select Finish.
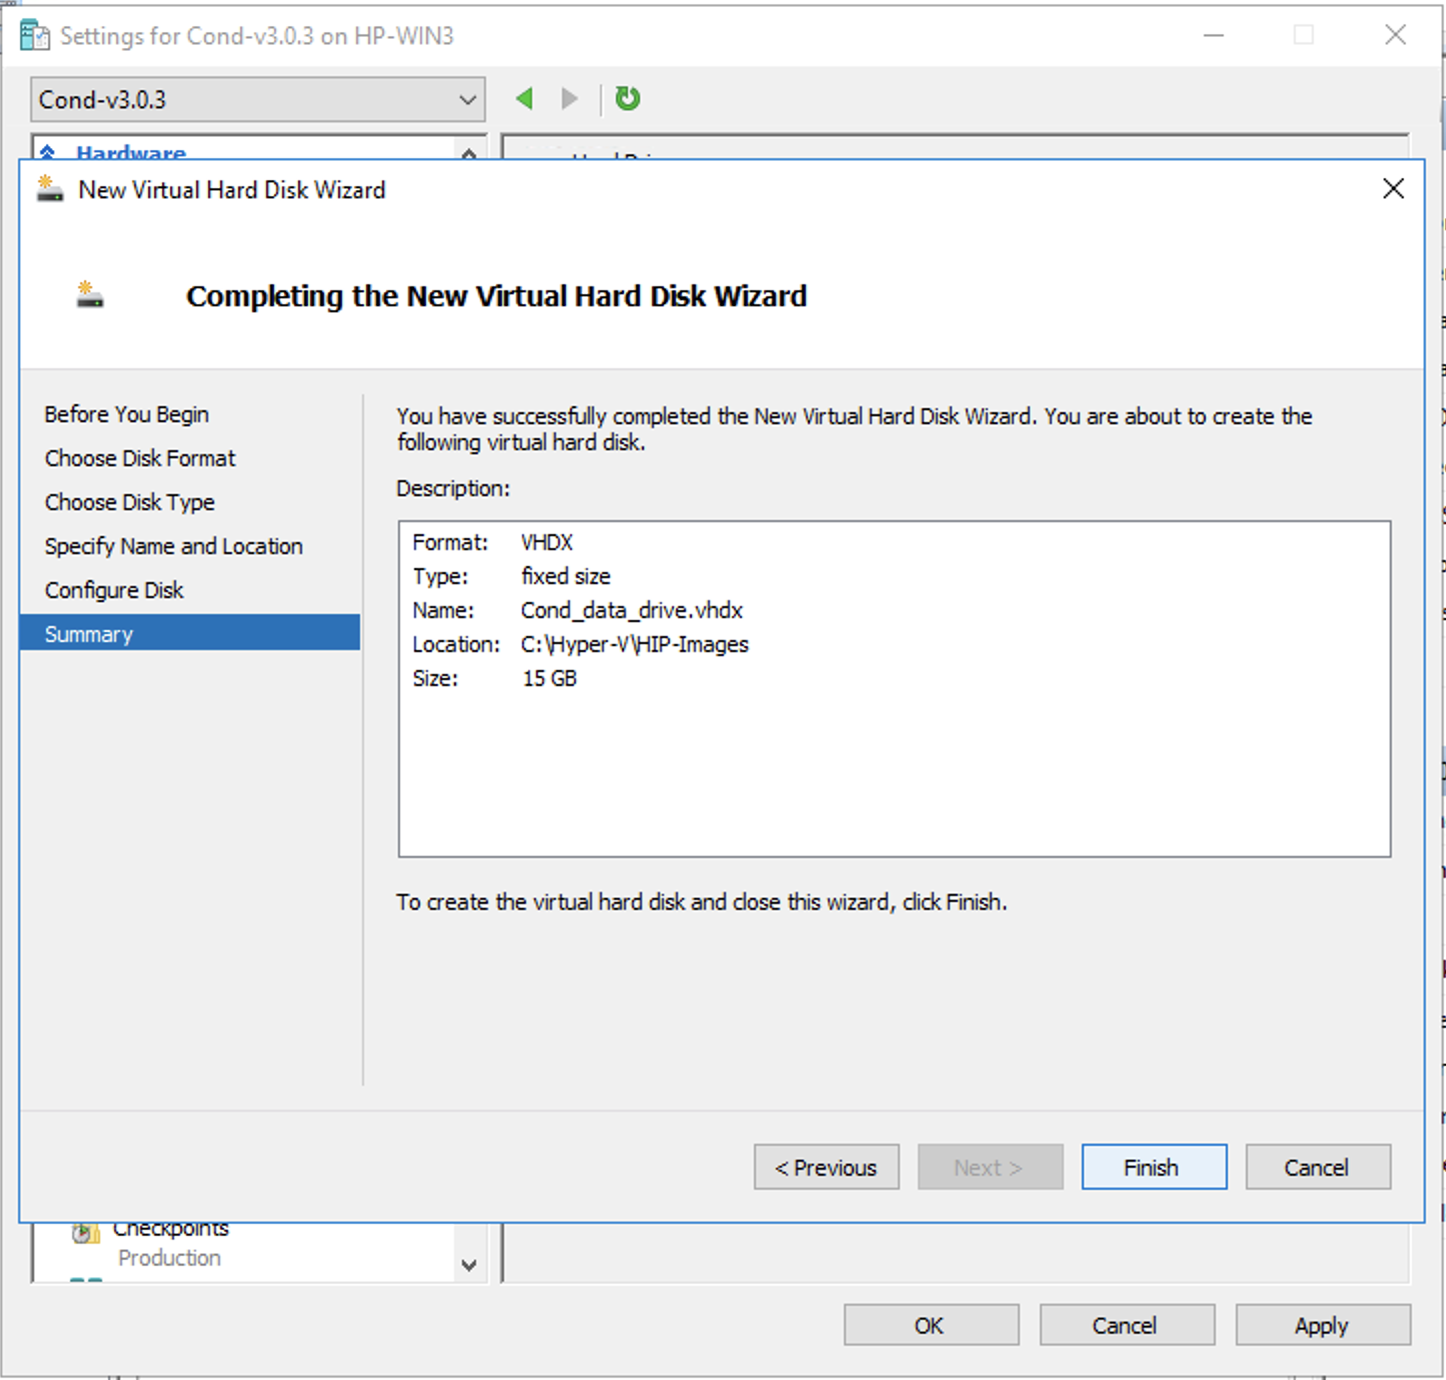
- Wait while Hyper-V creates the new virtual hard disk. This process can take up to 15 minutes.
- Add a second Network Adaptor – Still under the new Conductor virtual machine Settings, at the top, select Add Hardware. Select Network Adapter, and then select Add.
-
Attach Network Adapters – Now you will assign the network adapters for
your Conductor:
-
Select the first Network Adapter, and under Virtual
switch, attach it to your Administration network (or
your underlay, if they are the same), and select
Apply to save.
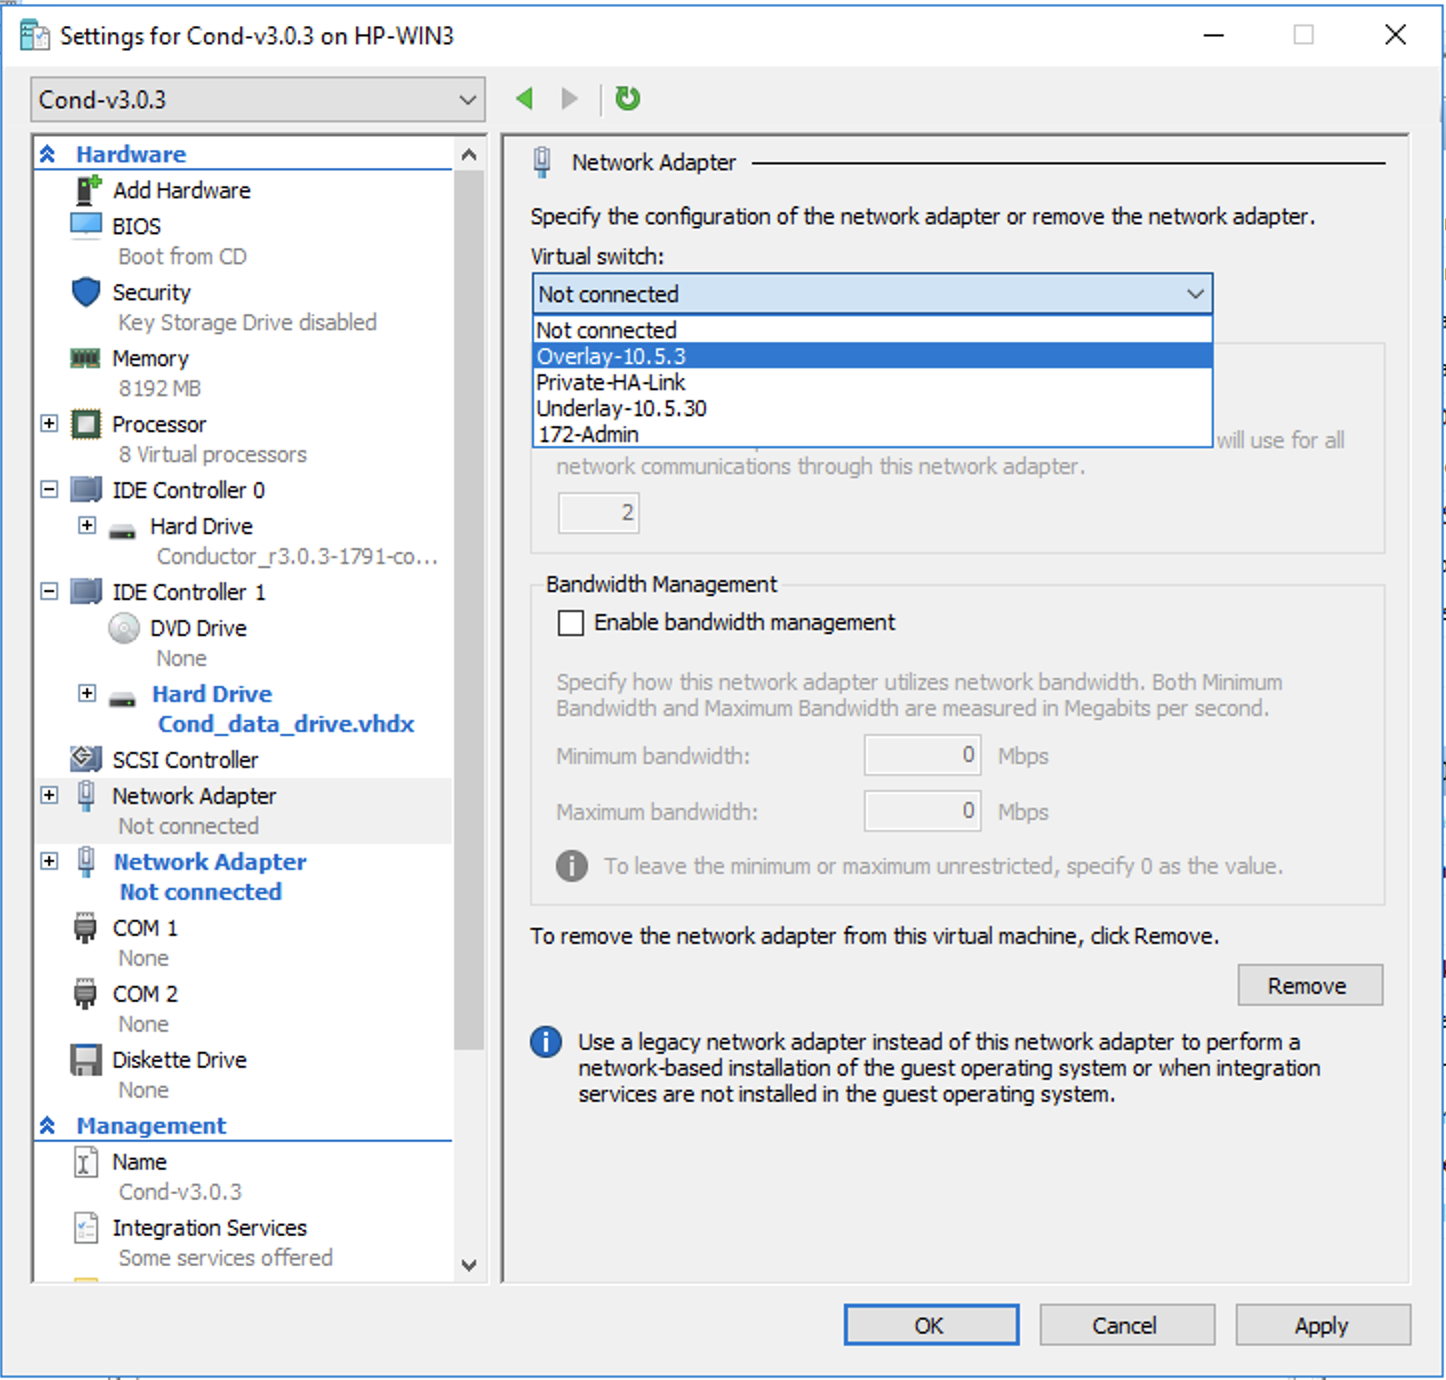
-
Select the first Network Adapter, and under Virtual
switch, attach it to your Administration network (or
your underlay, if they are the same), and select
Apply to save.
- Select Ok to exit the Settings page.